WhatsApp & WhatsApp Business Transfer/Backup/Restore/Export
Tenorshare iCareFone Transfer(iCareFone for WhatsApp Transfer) allows you to transfer WhatsApp/GB WhatsApp from Android to iPhone 14/Plus/Pro/Pro Max. Aside from transferring, it also allows you to backup, restore and export WhatsApp chats, contacts, media files (WhatsApp Business also included).
Available for macOS 13 Ventura and below Available for Windows 11/10/8.1/8/7Before you start, one thing you should know which is the steps to transfer/backup/restore/export WhatsApp Business between new iPhone 14 and Android are the same as WhatsApp. In this guide we will use WhatsApp as an example.
- Part 1. How to Transfer WhatsApp & WhatsApp Business to New Phone
- Part 2: GBWhatsApp Data Transfer
- Part 3. How to Backup And Restore WhatsApp & WhatsApp Business
- Part 4: GBWhatsApp Backup and Restore
- Part 5. How to Export WhatsApp & WhatsApp Business Chats/Contacts/Media Files
Part 1. How to Transfer WhatsApp & WhatsApp Business to New Phone
- 1. How to Transfer WhatsApp Messages from Android to iPhone 14
- 2. How to Transfer WhatsApp Messages from iPhone to Android
- 3. How to Transfer WhatsApp Messages from Old iPhone to iPhone 14
- 4. How to Transfer WhatsApp Messages from Android to Android
1. How to Transfer WhatsApp Messages from Android to iPhone 14
The steps to transfer WhatsApp messages from Android to iPhone have some requirements, make sure you've followed the guide step by step.
Step 1: Download and Install
1.1 Launch iCareFone Transfer and connect two devices on your computer. And then click "Transfer" to continue.
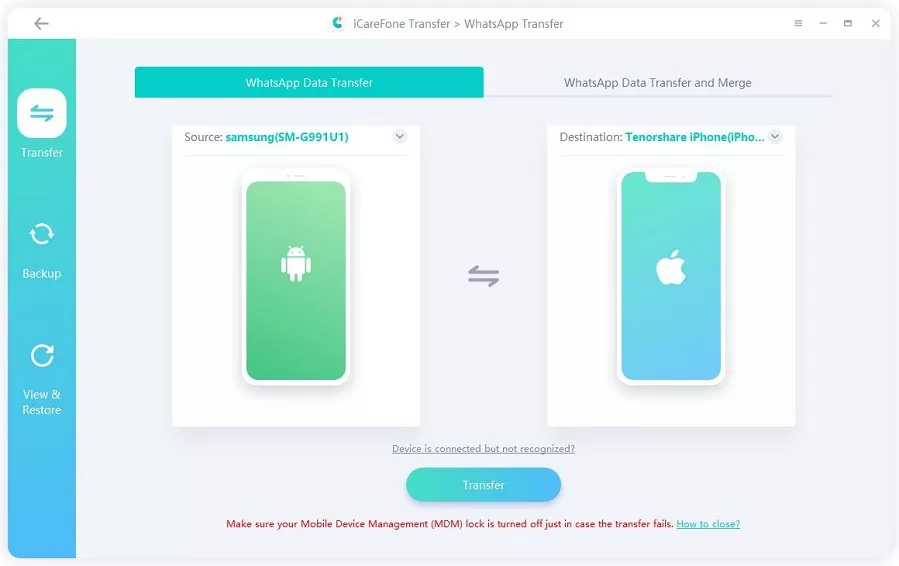
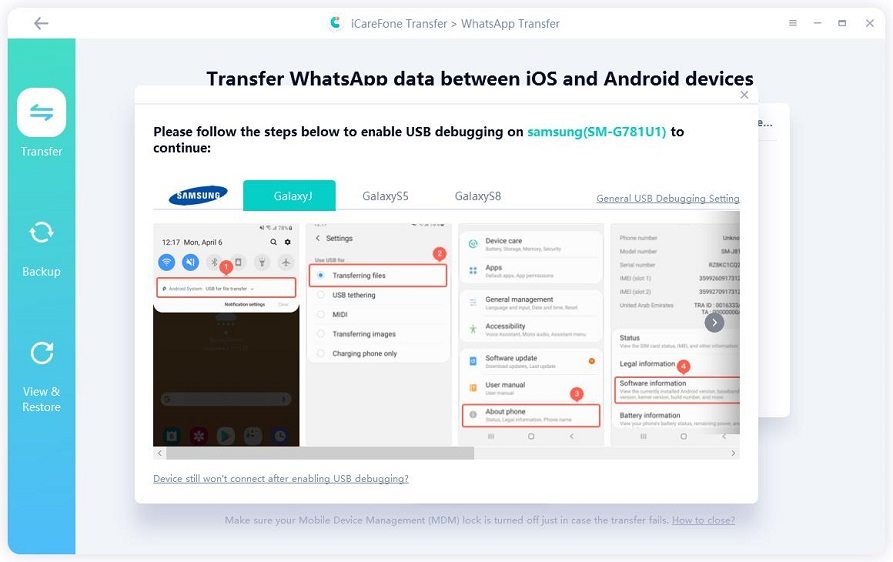
Note: On your Samsung device, you may need to enable USB debugging by following the screenshots.
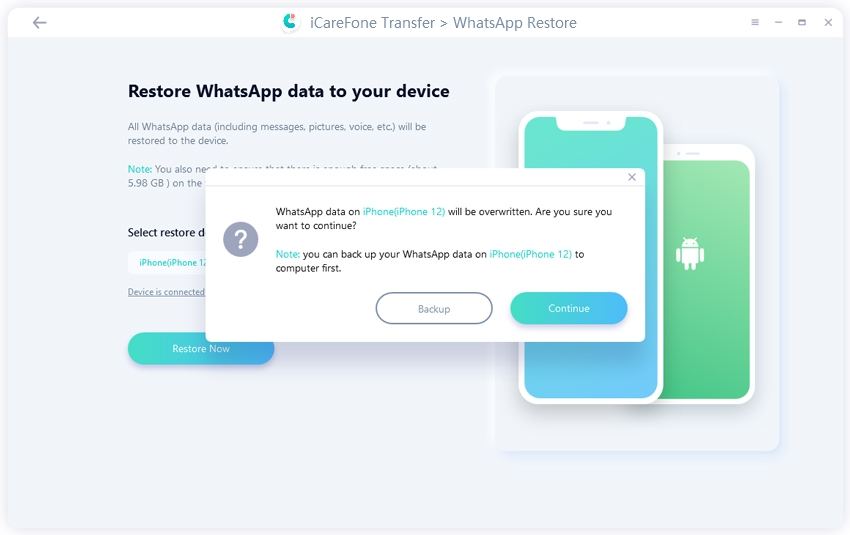
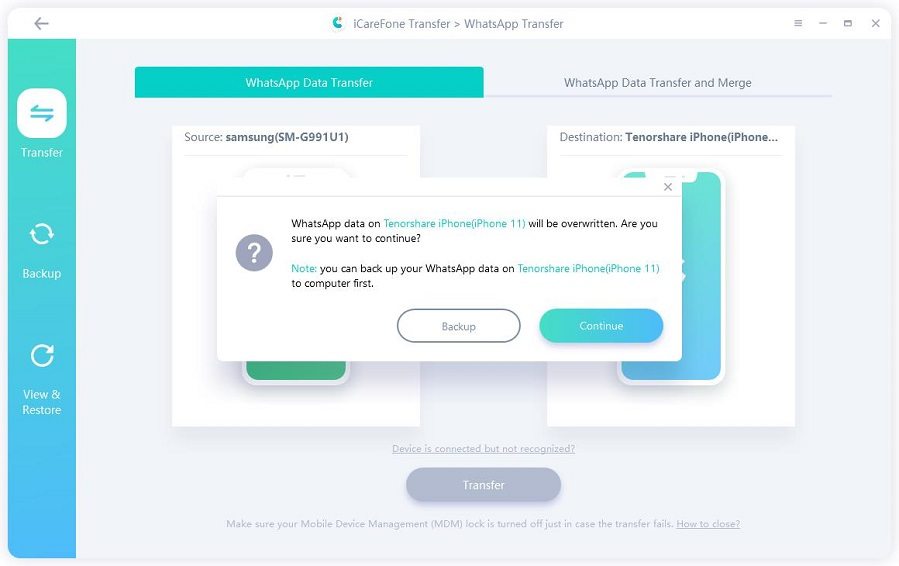
1.2 Here you will be asked to confirm the popup. You can make a WhatsApp backup on your iPhone. Then click "Continue" to proceed to the next step.
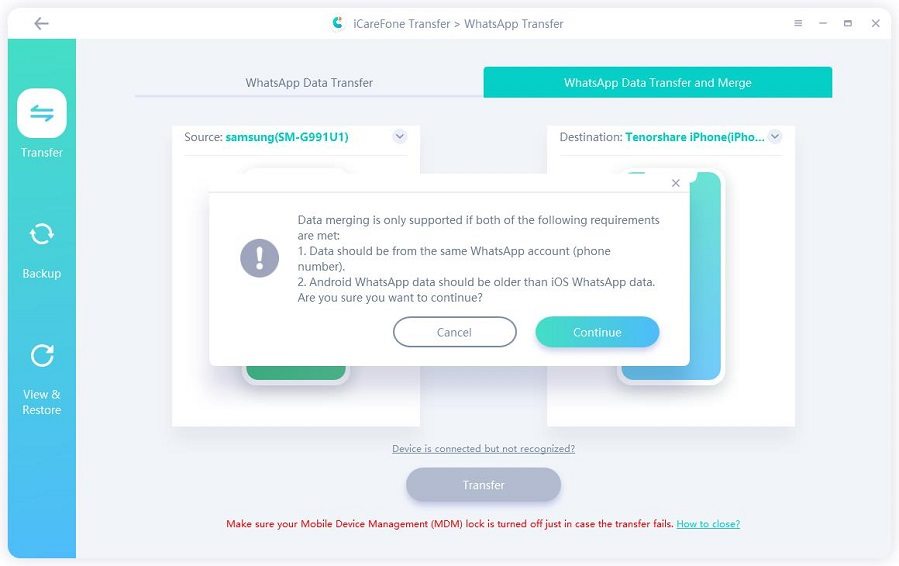
Notes: This will overwrite the WhatsApp data on your iPhone. Simply switch to the "WhatsApp data transfer and merge" feature if you wish to merge your iPhone and Android WhatsApp data.
Step 2: Back up WhatsApp Data
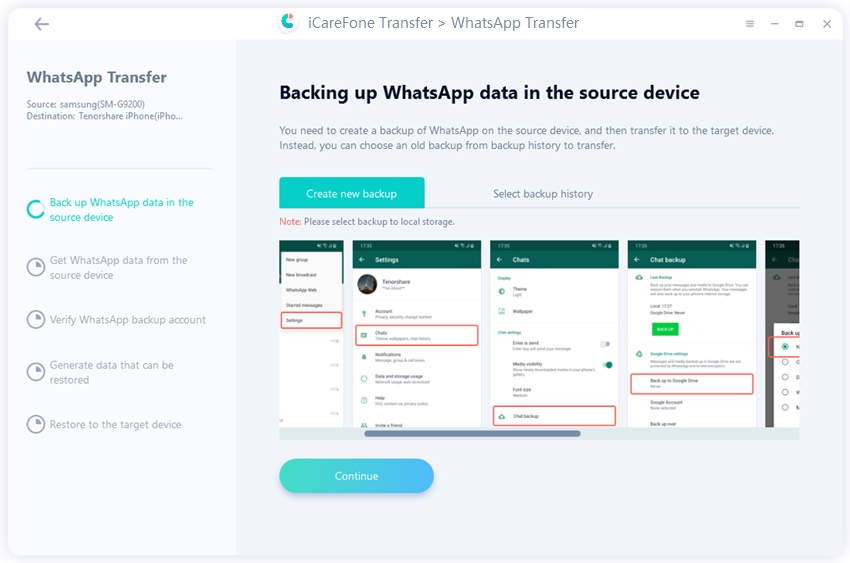
2.1 You need to back up WhatsApp data on your source device by following the screenshot instructions. If done, click "Continue".
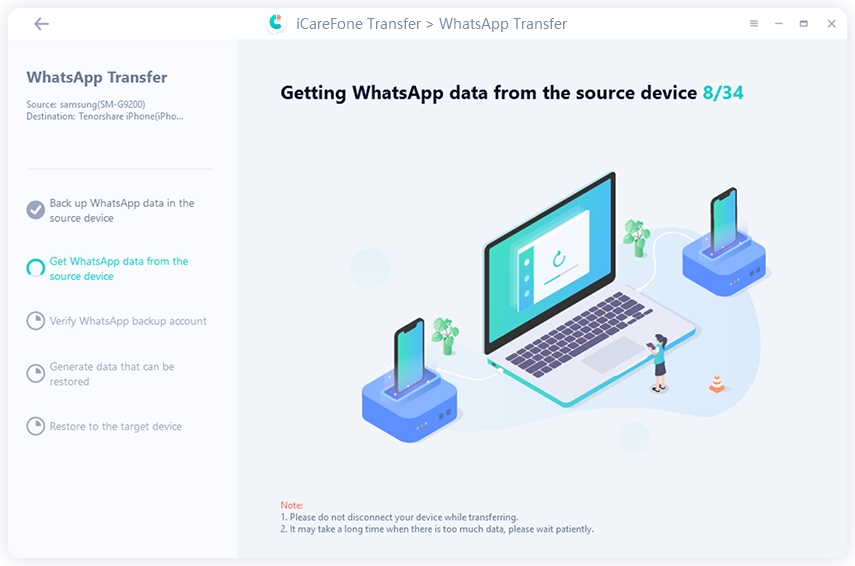
2.2 The program is getting data from the source device, please be patient and wait for the completion.
Step 3: Verify the Source Device WhatsApp Account
3.1 To keep your WhatsApp data safe, please verify the WhatsApp account you used to create the backup by entering country code and phone number.
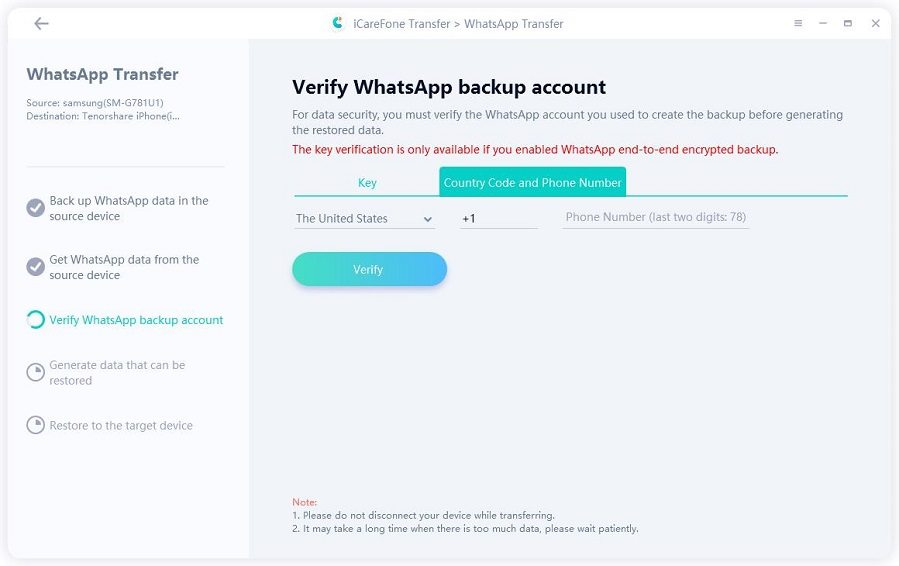
3.2 After entering the information, a window pops up to notify you that you may receive a WhatsApp verification code to your source device. Click "Continue" to go to verification interface.

Note: The WhatsApp account on your source device may be logged out during the verification process. In order to verify successfully, please do not log in again.
3.3 When your source device receives the 6-digit code, please fill in the line and click "Verify".
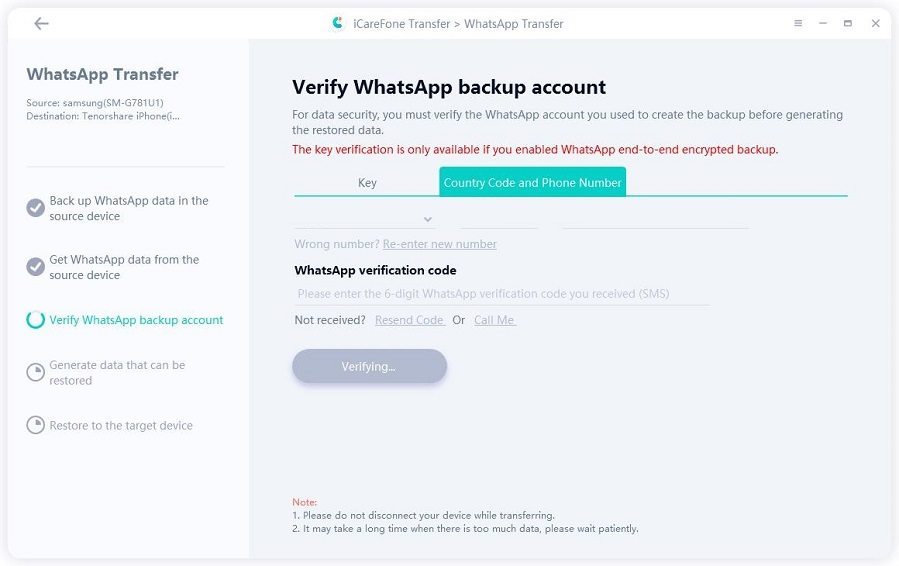
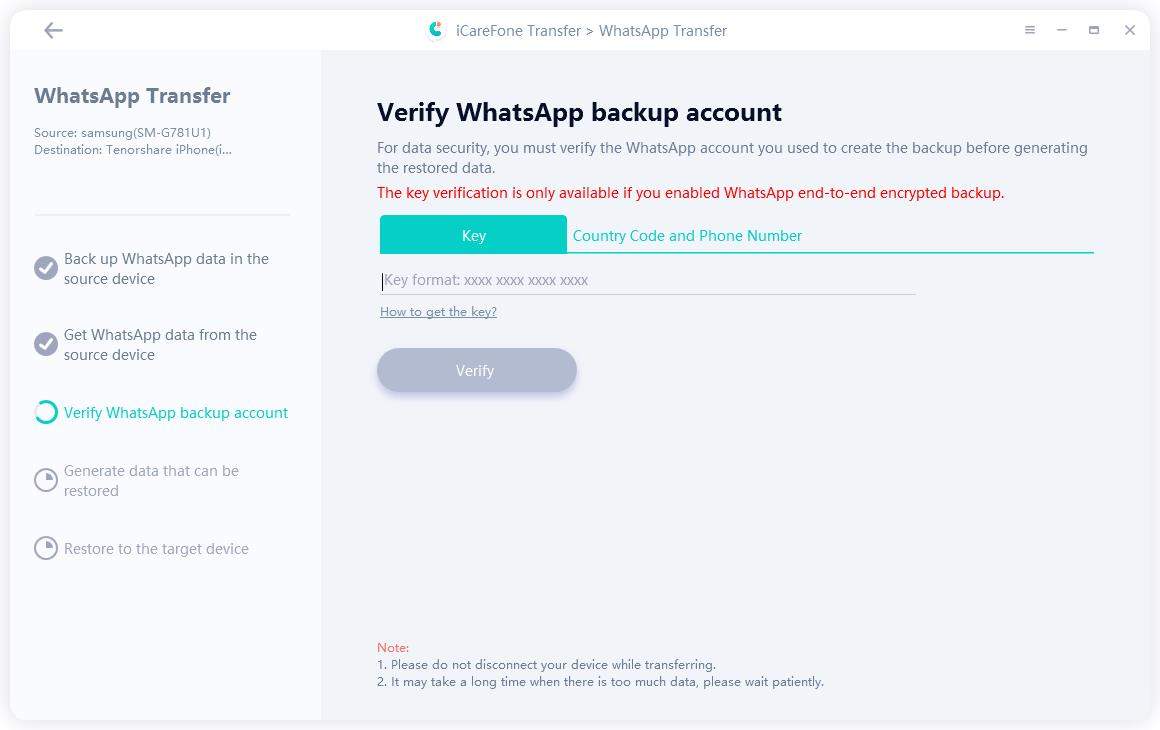
Note: If you’ve enabled WhatsApp end-to-end encrypted backup, you can also verify your WhatsApp backup account by entering the 64-digit key.
Step 4: Generate Data to Your iPhone
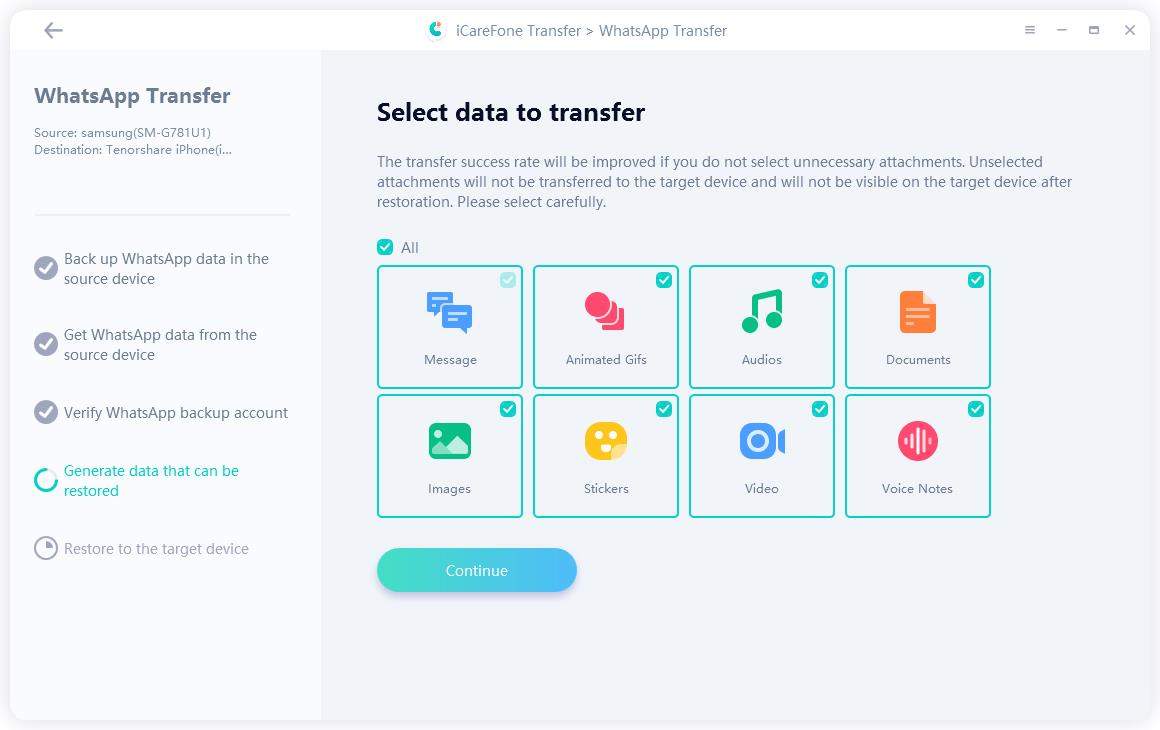
4.1 Once the verifcation is successful, you can select the type of attachment you need to transfer. Unselected attachments will not be transferred to the target device. Click "Continue" to proceed to the next step.
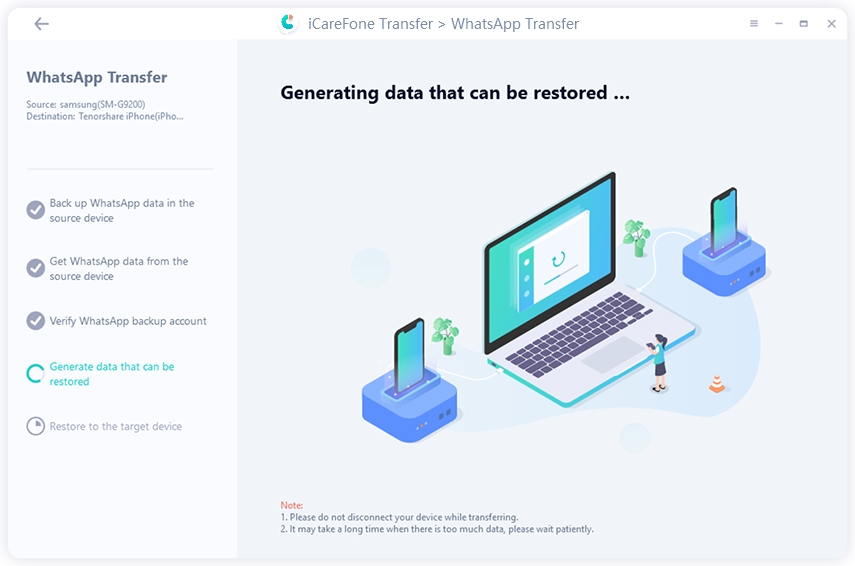
4.2 Now the program will automatically generate data which will be restored to the target device.
4.3 Before restoring data, please make sure that you have logged in WhatsApp on your iPhone, otherwise the data will not be visible. If confirmed, hit "Logged in".
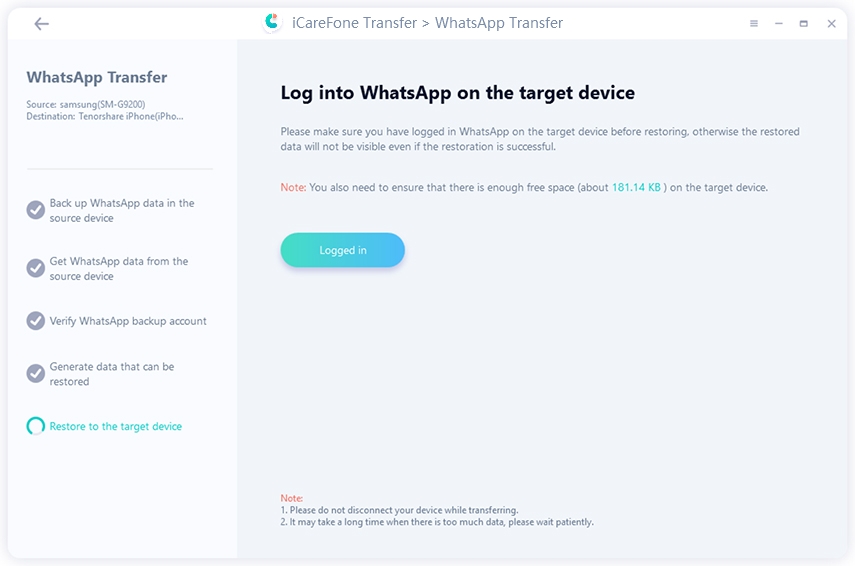
Note: Make sure there is enough space on the target device.
Step 5: Restore WhatsApp data to iPhone Successfully
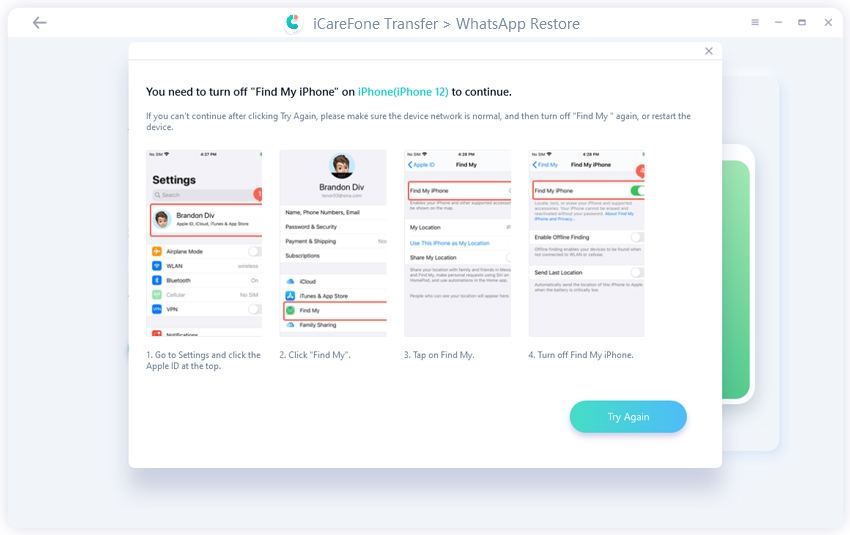
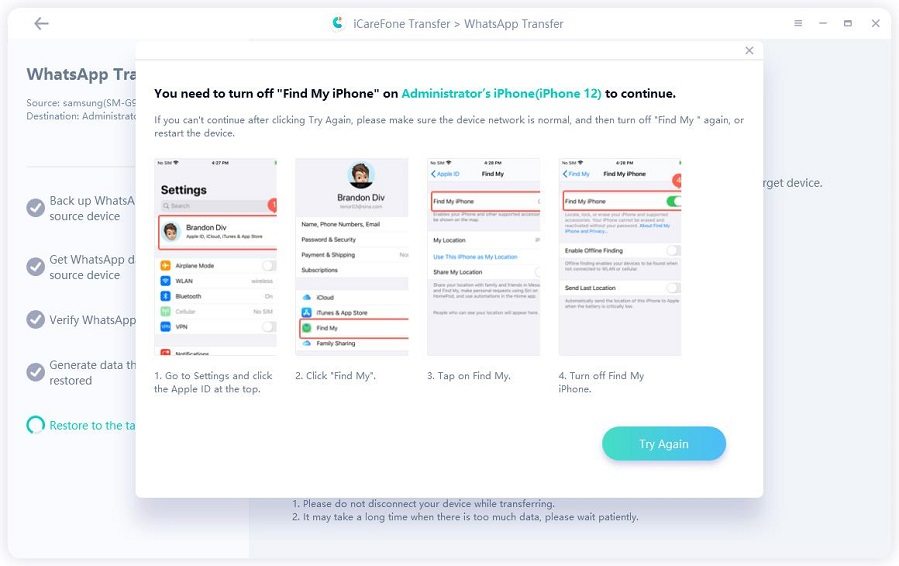
Note: You will be asked to turn off "Find My iPhone", please follow the on-screen instructions to turn off "Find My iPhone" to continue.
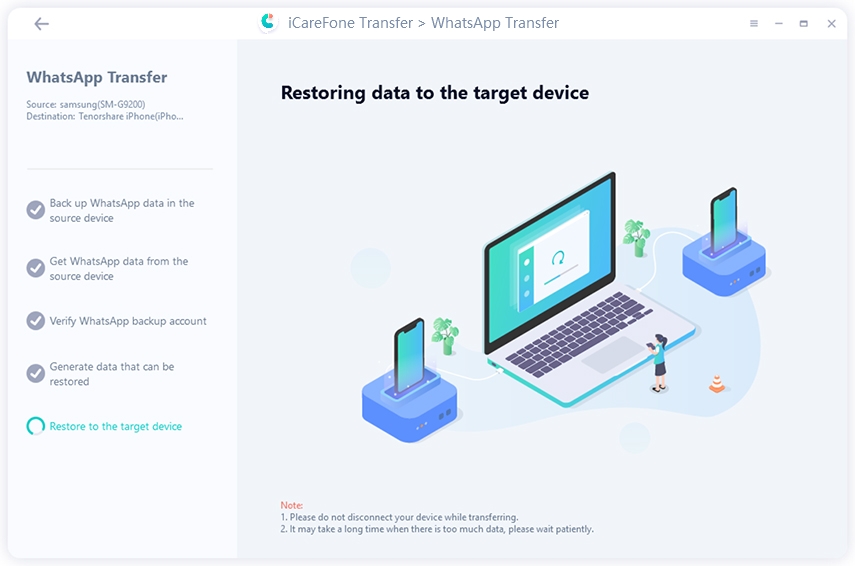
5.1 The software is restoring data to your iPhone. The speed of restoration will depend on the size of the data, please be patient.
5.2 When the data is completely transferred to your device, you will see the following interface. Share it if you like.
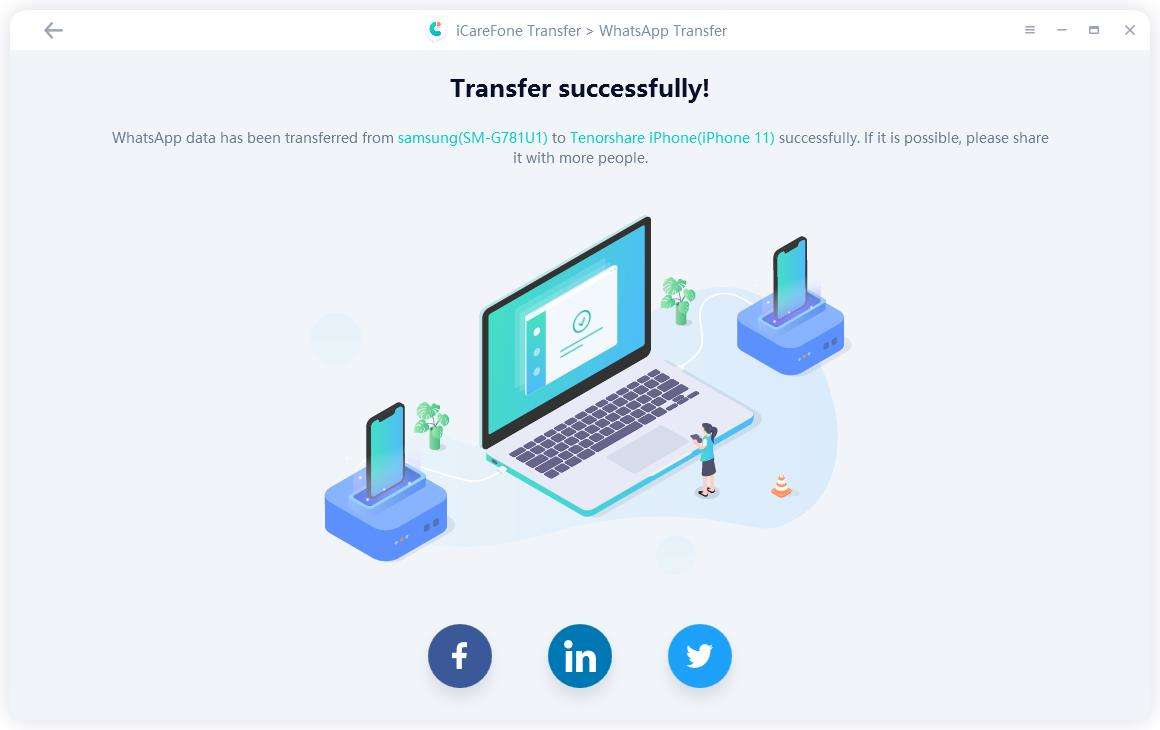
Note: When the whole process finishes, your target device will restart.
You can also check the video guide:
2. How to Transfer WhatsApp Messages from iPhone 14 to Android
Here is a guide for how to transfer WhatsApp chat history from iPhone to Android. In fact, the most of the process is similar to the one of how to transfer WhatsApp from iPhone to iPhone. But there are still some details are different. Let's check.
Step 1 Download and Install
After installing iCareFone Transfer on your PC/Mac, then connect iPhone and Android to the computer.
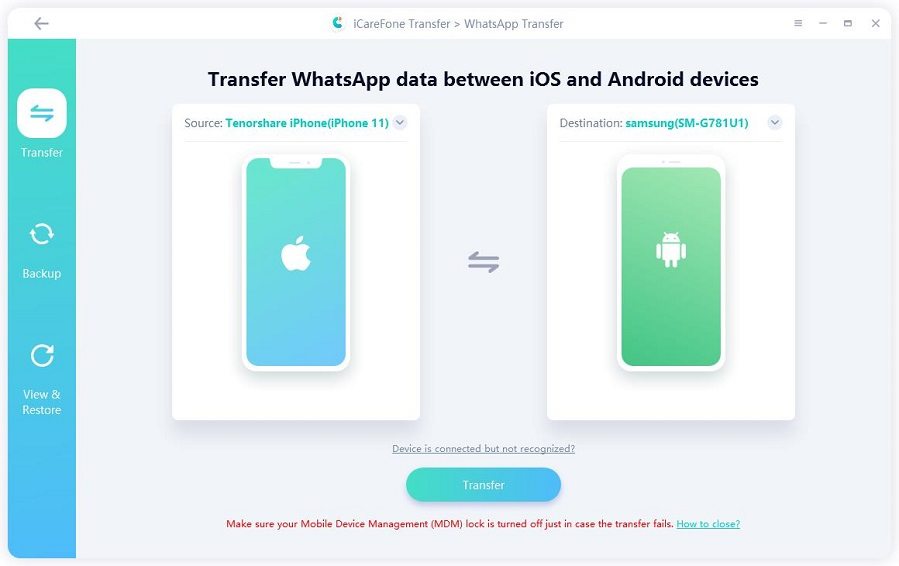
Note: By default, the program will automatically recognize your device when you plug in the devices. If not, you may need to unlock screen to get the trust for the computer.
Step 2 Running WhatsApp Transfer
2.1 After clicking "Transfer", you will get a message on the popup. If there is no doubt, press "Yes" to go on.
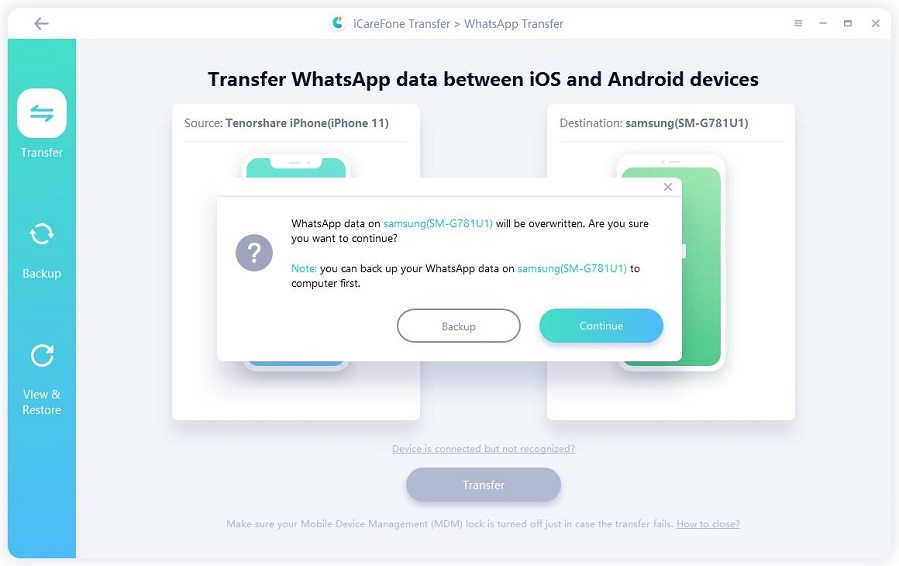
Note: Your previous WhatsApp data on the target device will be overwritten once you click "Yes".
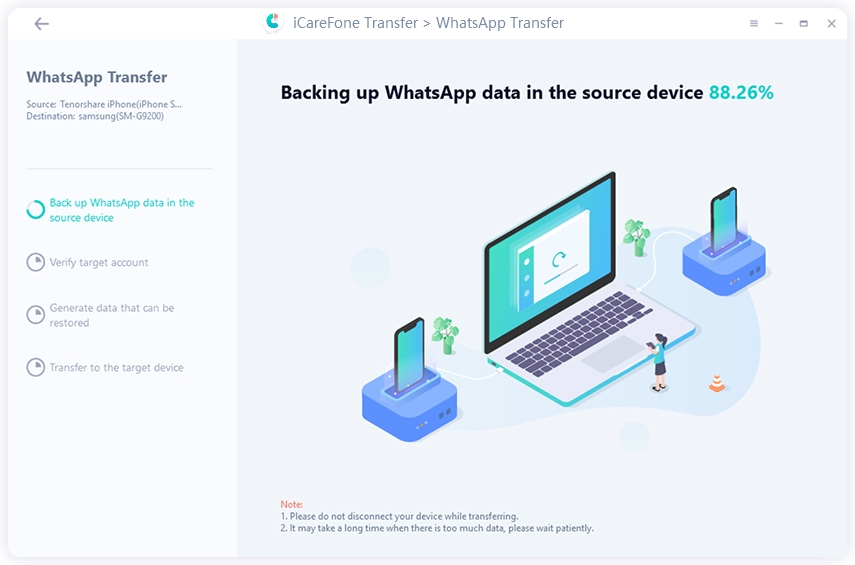
2.2 The program is backing up WhatsApp data on your source device. The backup speed just depends on the size of the backup files.
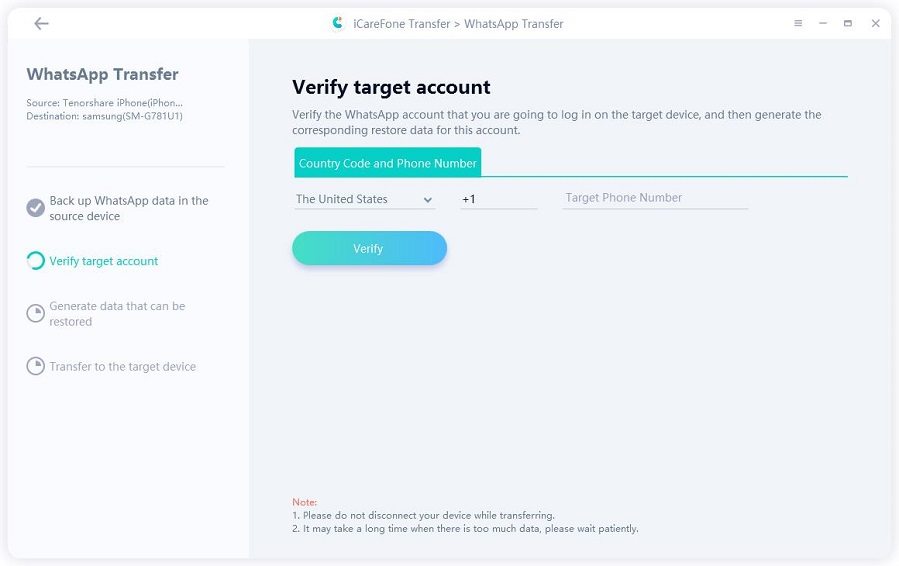
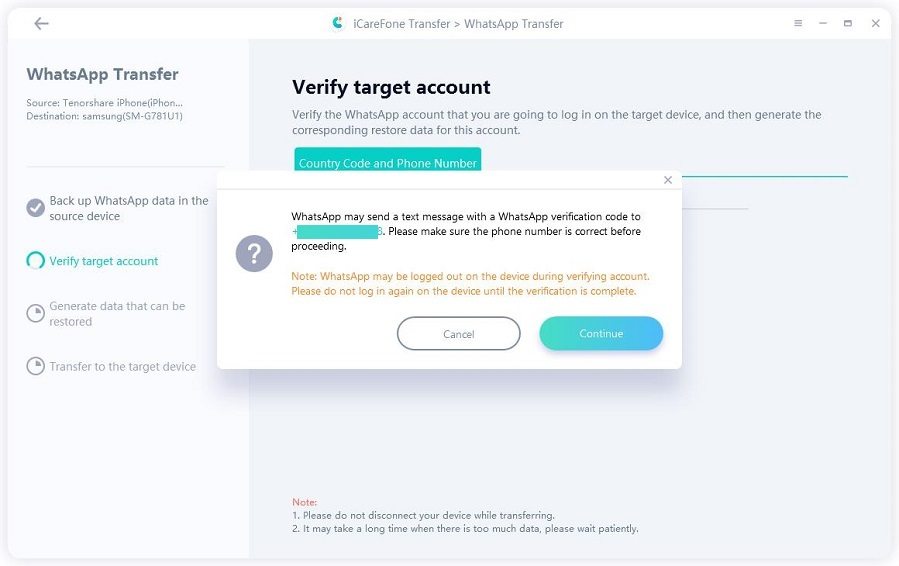
2.3 To protect your data security, please verify the WhatsApp account which will be logged into the target device. To do that by entering your country code and phone number of the target device, then click "Verify".
2.4 Then, you will get a 6-digit WhatsApp verification code on the target device, please enter the verification code on the horizontal line, and then click "Verify". Just wait for the WhatsApp account to be verified successfully before proceeding to the next step.
Note: If you can"t get the verification code, you can hit "Resend Code" or "Call Me" to get the verification code. Remember there are limitations on obtaining verification codes, no more than 3 times a day.
Step 3 Transfer Successfully
3.1 When the target device WhatsApp account verification is successful, the program will start to generate data to the target device and you can select the desired attachment type.
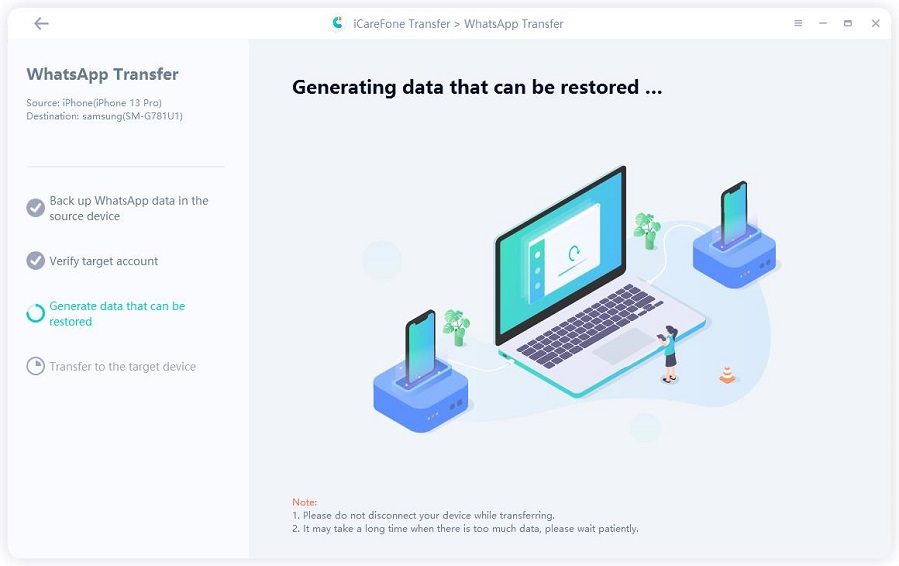
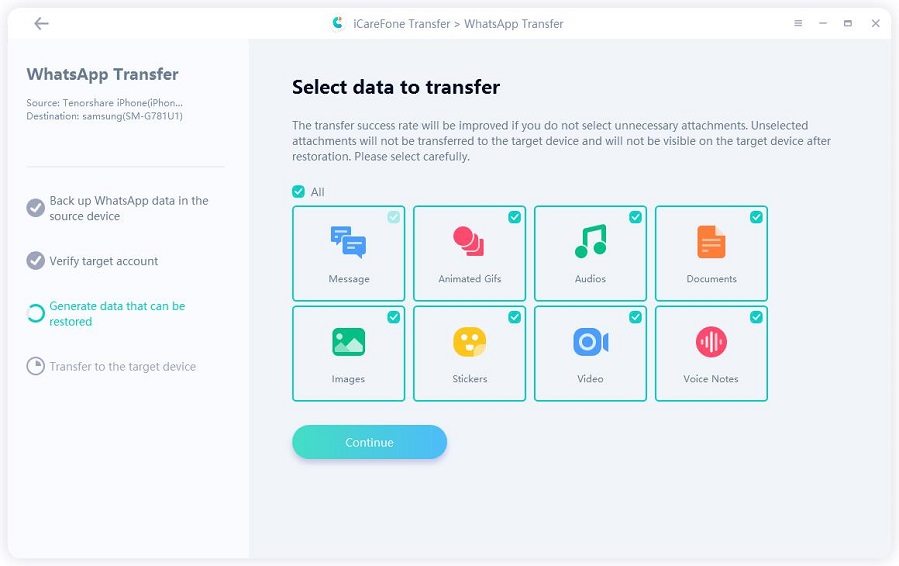
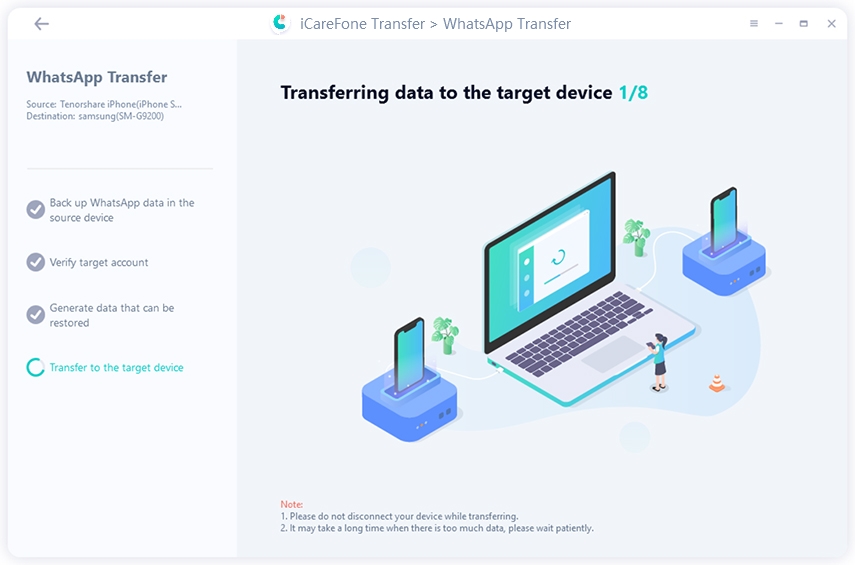
3.2 When the data has been generated, the program will automatically transfer data to the target device.
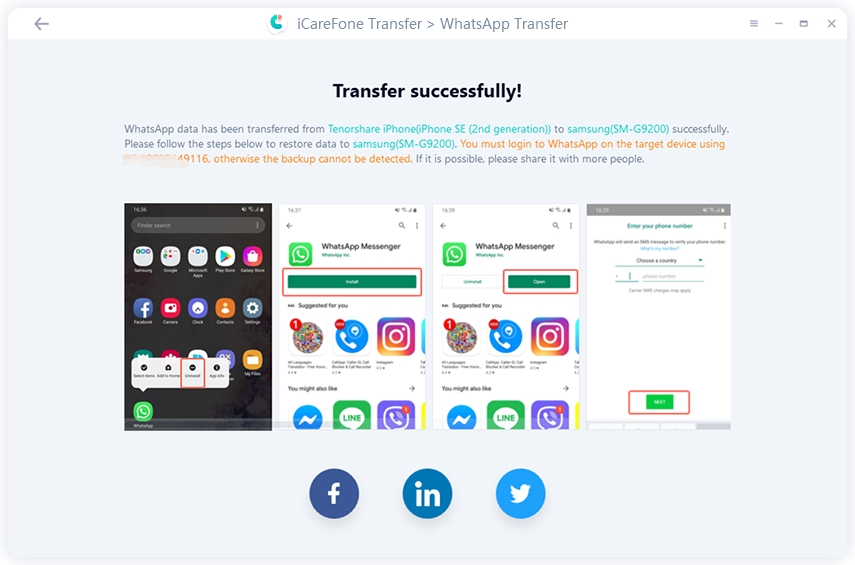
3.3 Then all WhatsApp data has been transferred from iPhone to Android successfully, please refer to the screenshot guidelines to restore data on your target device.
You can also check the video guide:
3. How to Transfer WhatsApp Messages from iPhone to iPhone 14
Transfer WhatsApp chats from iPhone to iPhone is quite easy, follow the steps to start the process.
Step 1 Download and Install
Download and install iCareFone Transfer on your PC/Mac, then connect two iPhones to the PC/Mac. Then select one as the source device.
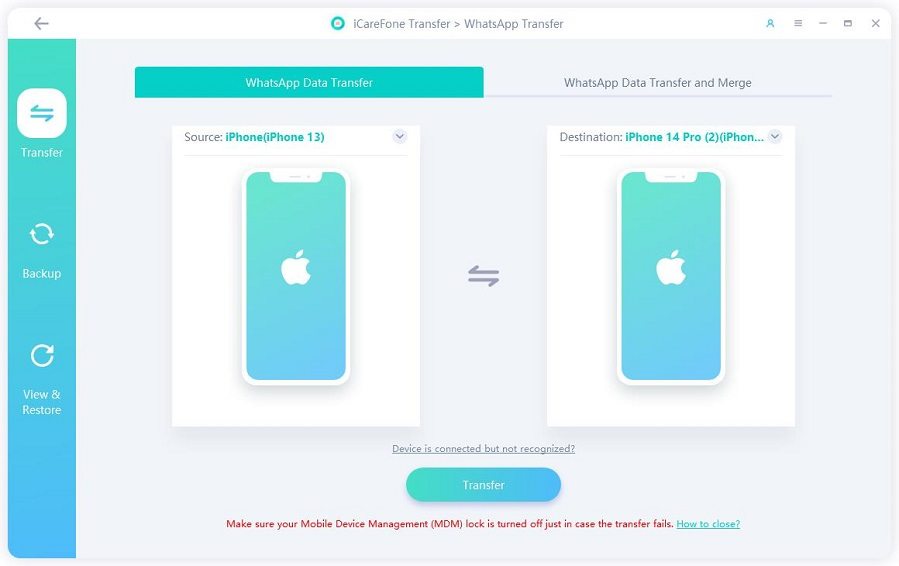
Note: By default, iCareFone Transfer will automatically recognize your device. You may need to unlock the screen of the iPhone to trust this computer at times.
Step 2 Launch iCareFone Transfer
2.1 Then click "Transfer" in the middle of the bottom and you'll see a prompt showing as follows. Once you confirmed that your previous WhatsApp data will be overwritten, and then click "Yes" to go on.
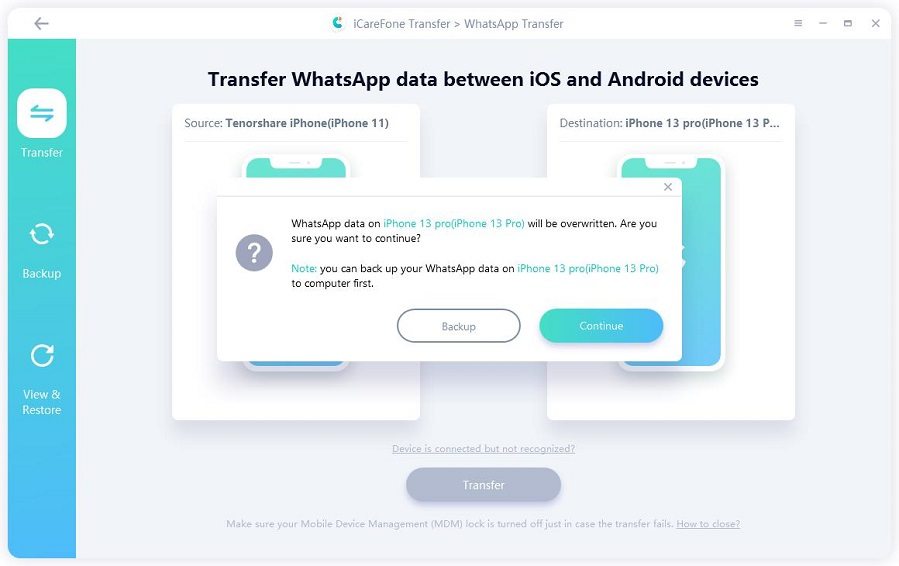
2.2 After you tap "Yes", the program begins backing up WhatsApp data on the source device.
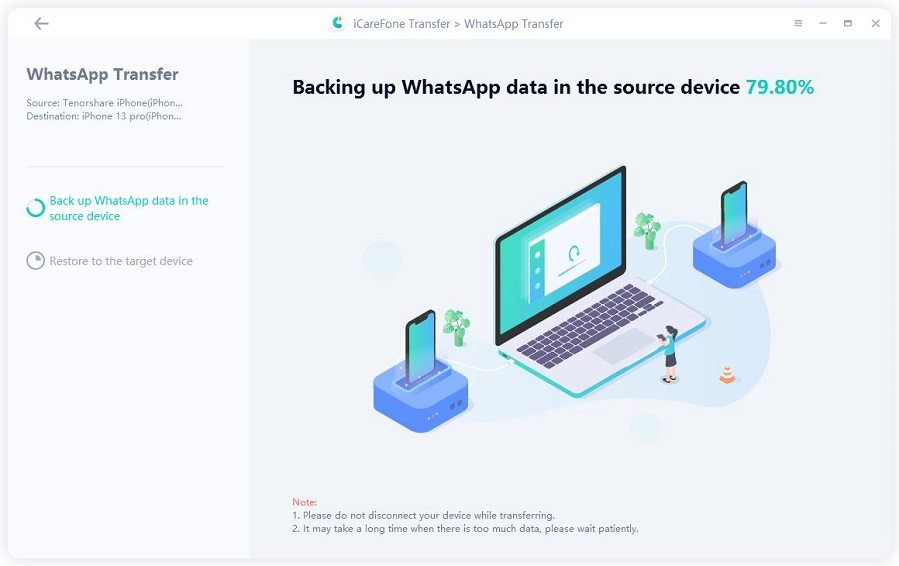
Note: The backup speed depends on the size of your backup files.
2.3 Make sure that the WhatsApp account has logged into the target device. If you have done, then click "Logged in "to continue.
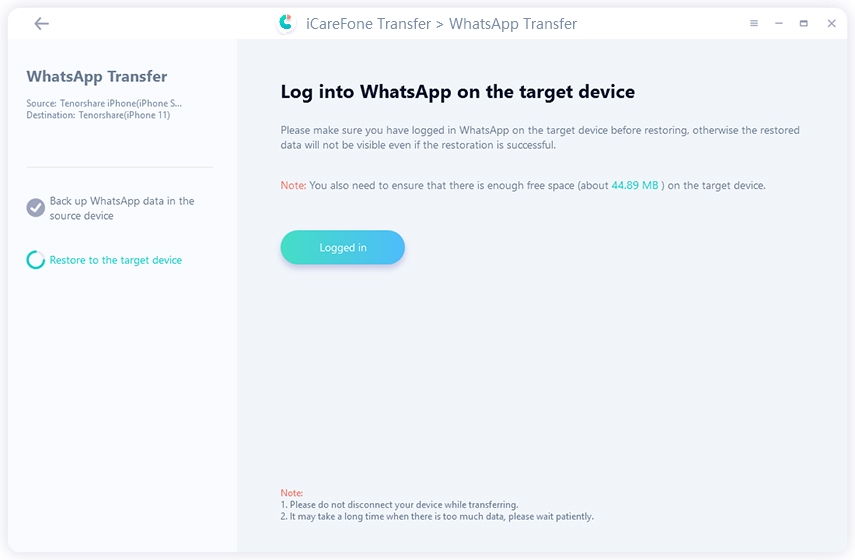
Note: If you don't log in WhatsApp before restoring data to the target device, the data that has been restored will be invisible.
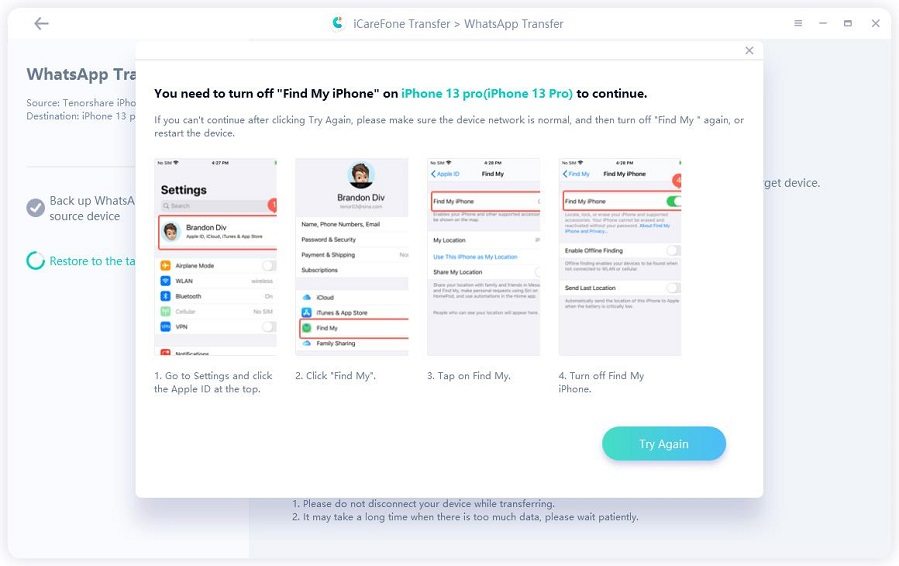
Notes: If your iPhone doesn"t turn off "Find My iPhone", you will be required to turn off it. Do as screenshots show.
Step 3 Transfer Successfully
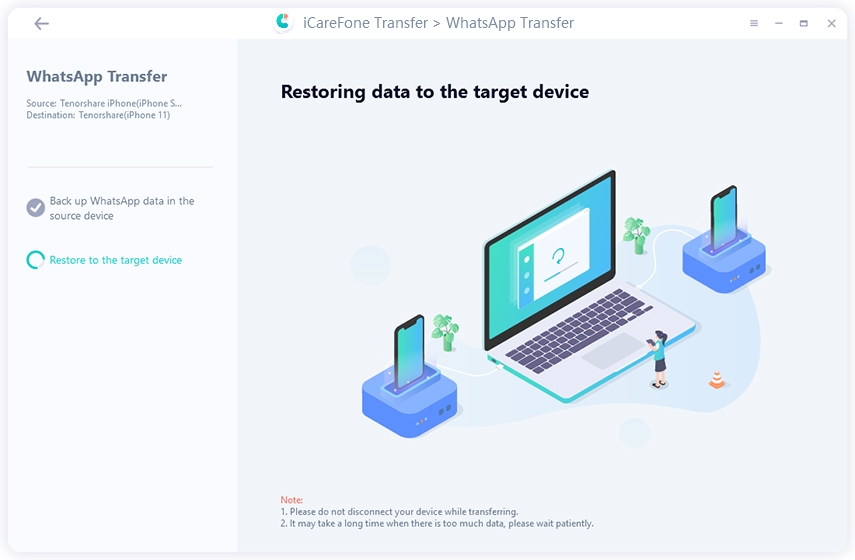
3.1 The restoration process is going on. And it will take a few minutes depending on the size of data. Please wait patiently.
3.2 When all WhatsApp data has been transferred from iPhone to iPhone successfully. You will get the following interface.
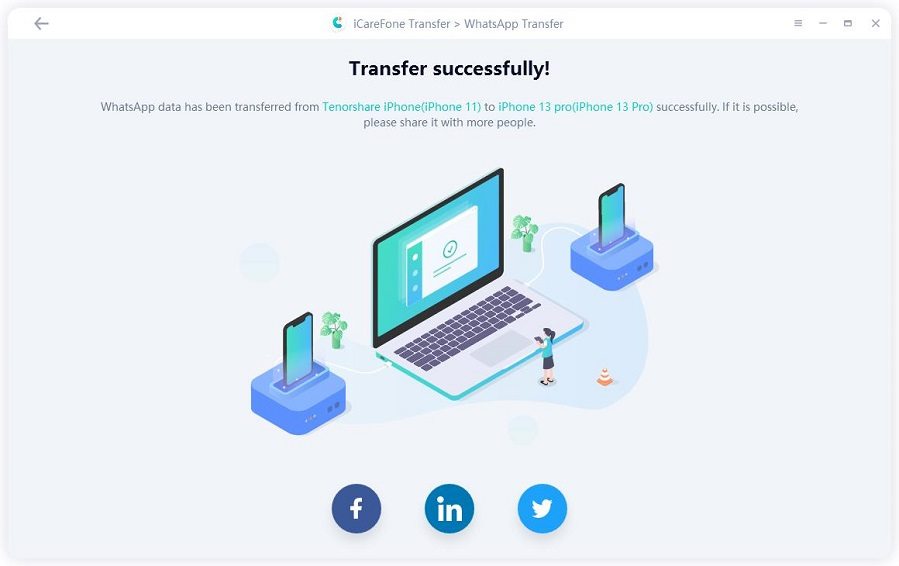
Note: WhatsApp account will be logged out on the target device when WhatsApp data has been transferred successfully. You need to log in to the WhatsApp account again on the target device.
4. How to Transfer WhatsApp Messages from Android to Android
Transfer WhatsApp Messages from Anroid to Android is much easier than Android to iPhone.
Step 1: Download and Install
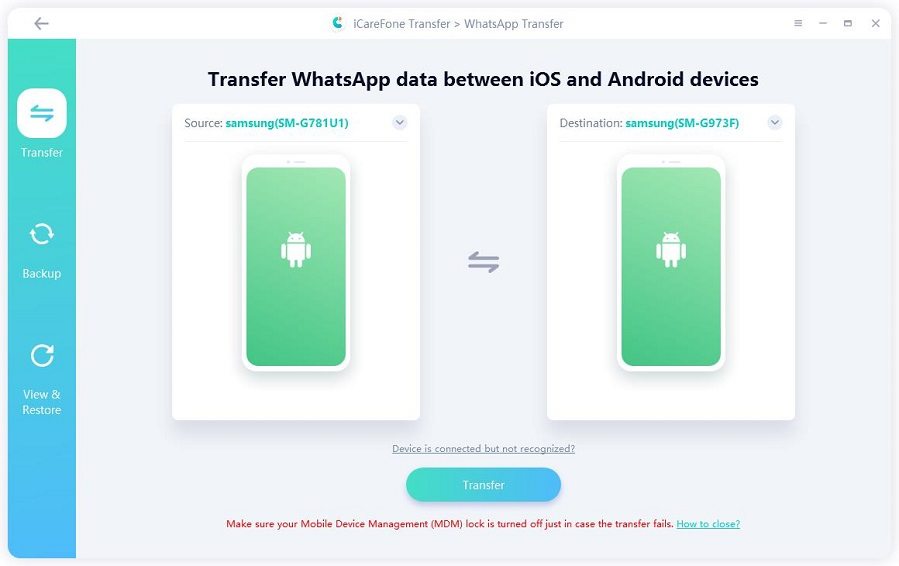
1.1 Open iCareFone Transfer on your computer and connect two Android devices, then click "Transfer" in the middle of the bottom to start.
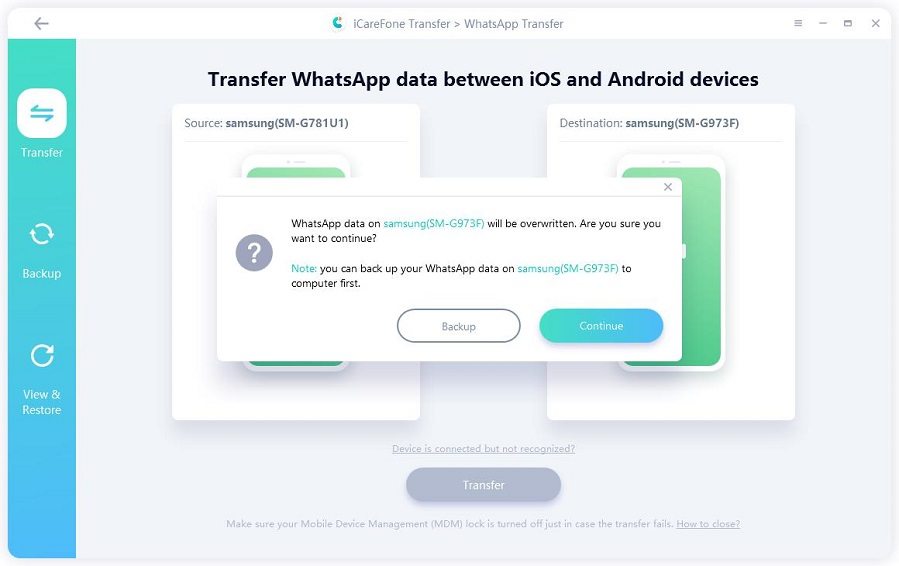
1.2 A message pops up to remind that the data on the target device will be overwritten. If you agree, please click "Yes" to continue.
Step 2: Back up WhatsApp Data
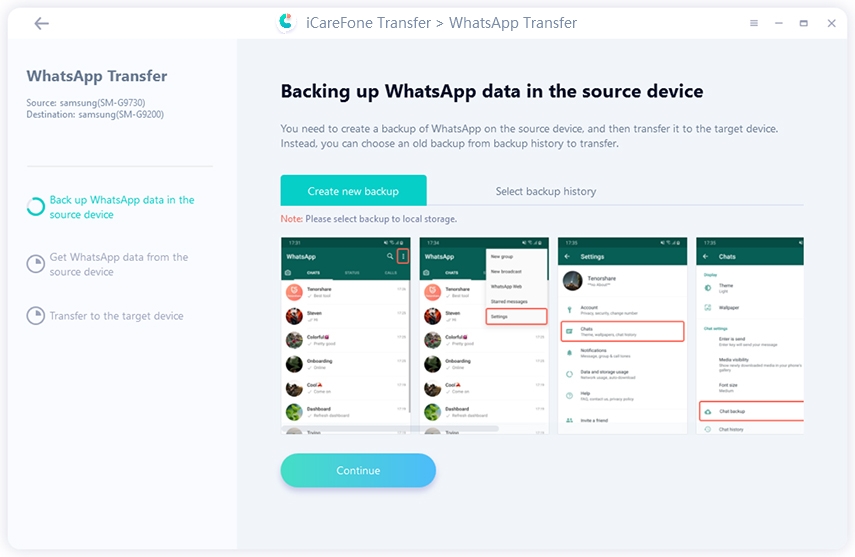
2.1 In order to transfer data to the target device, your data on the source device needs to be backed up by the following screenshot instructions. If you have completed these steps, click "Continue".
Step 3: Transfer Successfully
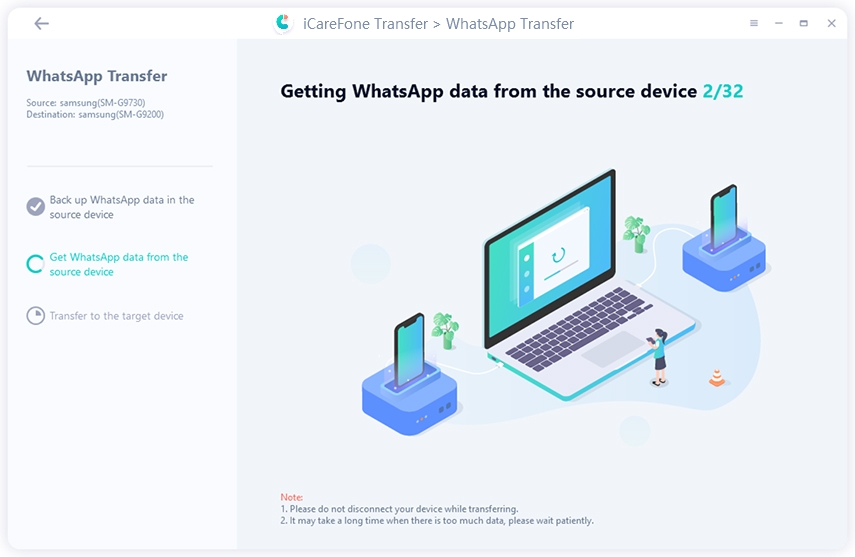
3.1 The program is getting the data you just backed up on the source device. Don"t disconnect the devices while getting WhatsApp data.
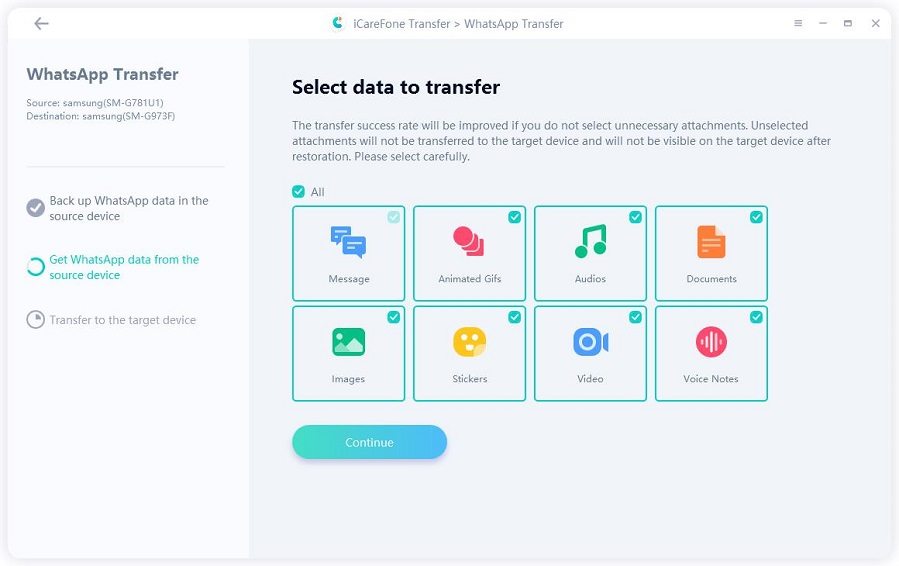
3.2 Then you can decide which data you want to transfer
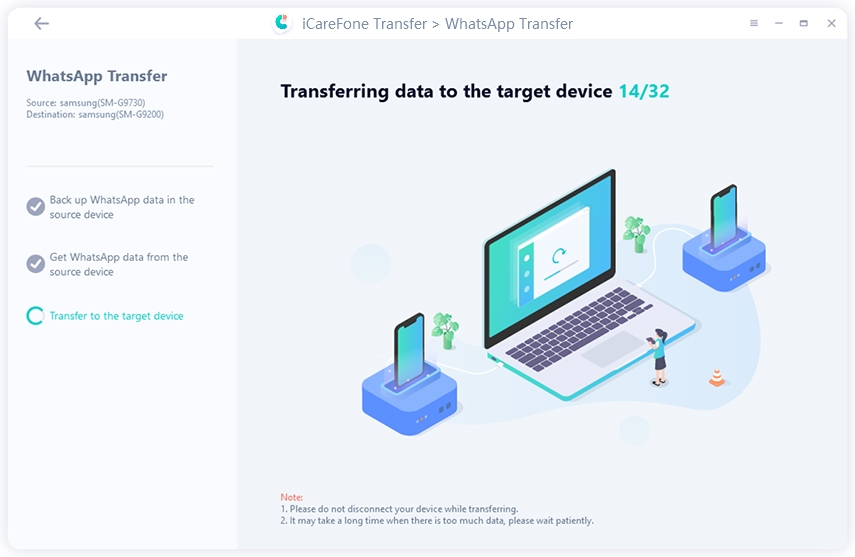
3.3 WhatsApp data is being transferred to the target device, it may take a few minutes based on your data size.
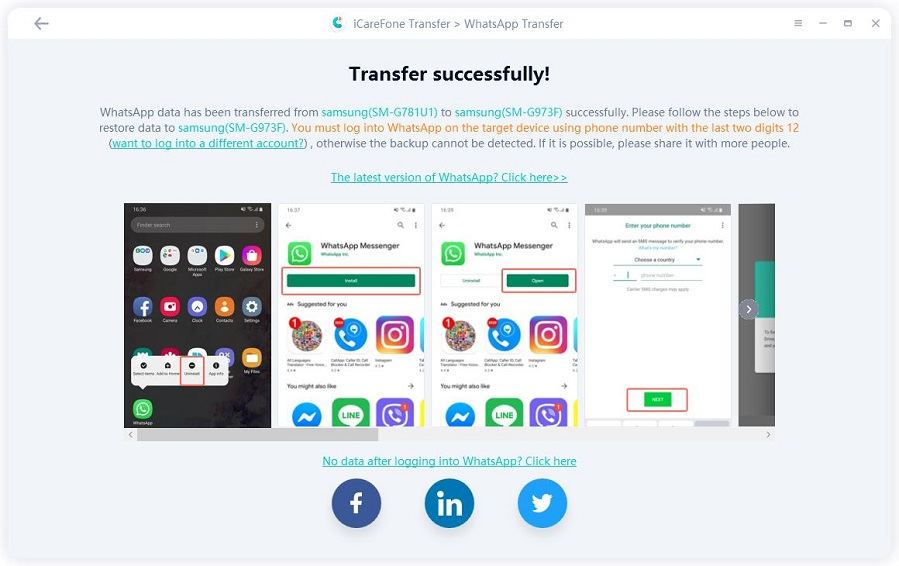
3.3 When you see the following interface, it indicates that the WhatsApp data has been successfully transferred to the target device. You only need to follow the prompts on the target device to see the data.
Part 2: GBWhatsApp Data Transfer
- 1. Transfer Android GBWhatsApp Data to iPhone WhatsApp
- 2. Transfer Android GBWhatsApp Data to Android WhatsApp
- 3. Transfer Android GBWhatsApp to New Android Phone
1. Transfer Android GBWhatsApp Data to iPhone WhatsApp
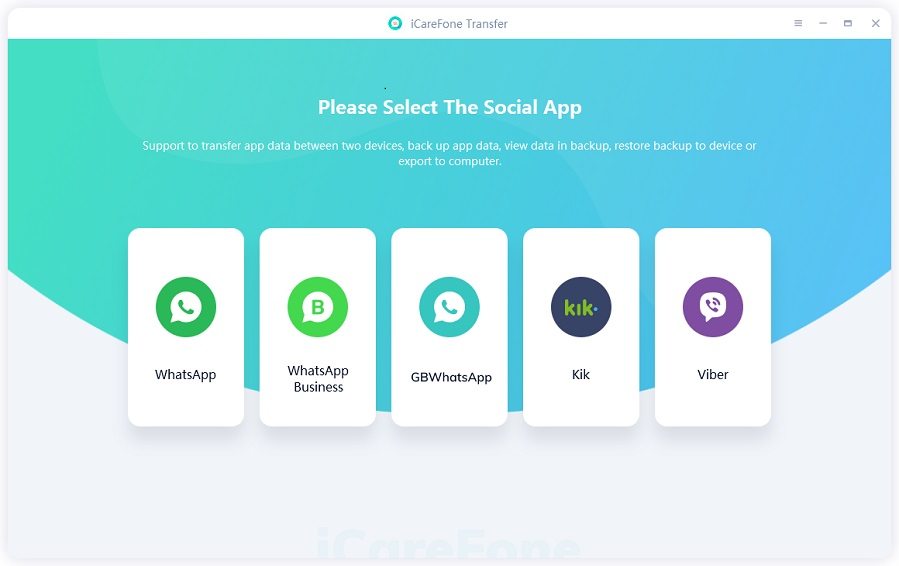
Step 1 Download and launch Tenorshare iCareFone Transfer on your computer. Choose the GBWhatsApp icon on the main interface.
Step 2 Then connect your Android device and iPhone to the computer.
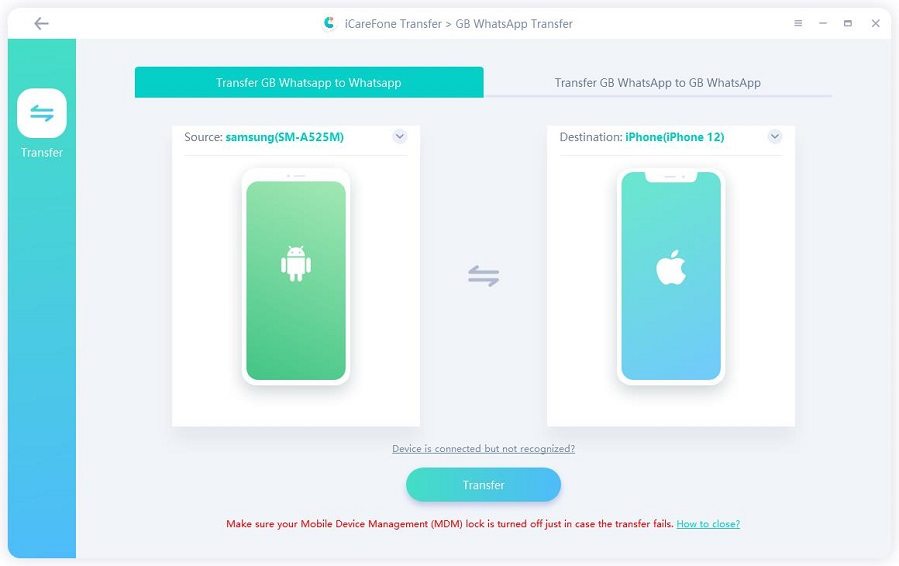
Note:On your Android device, you may need to enable USB debugging. And on your iOS device, you need to select "Trust" in the pop-up window of your device.
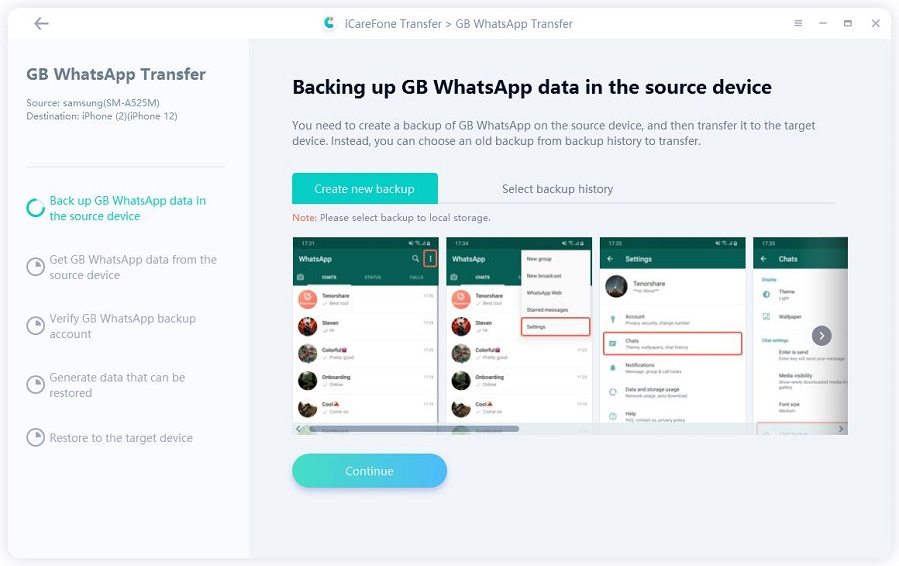
Step 3 Now please follow the screenshots’ guide to backup the GBWhatsApp data on your Android device. When you are done, click Continue.
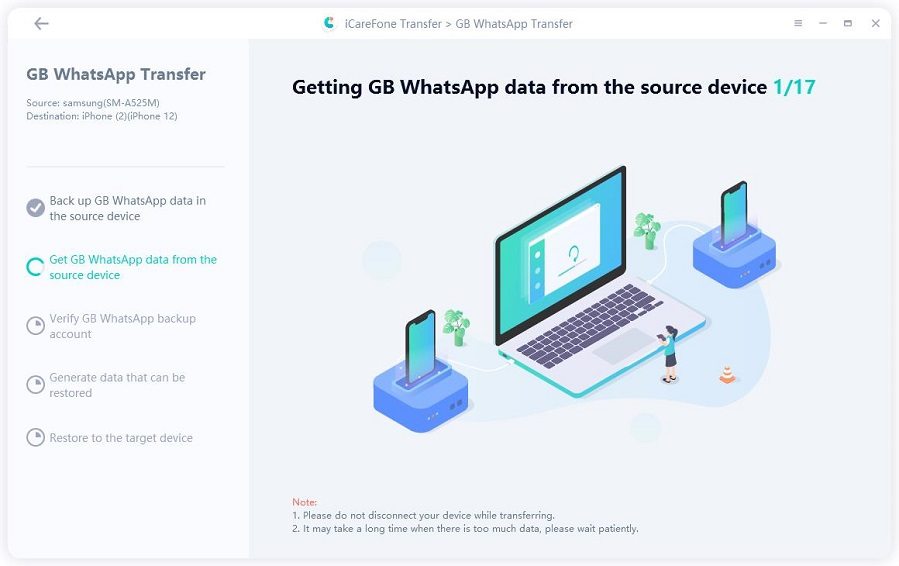
Step 4 iCareFone Transfer is getting GBWhatsApp data from your source device. Please wait for a while and do not disconnect your devices.
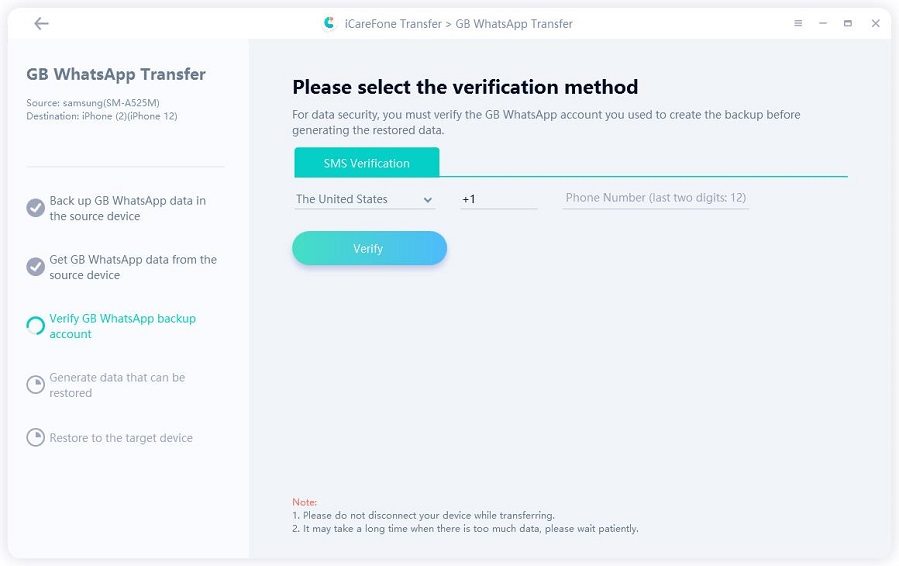
Step 5 For data security, you need to verify your GBWhatsApp account with your cell phone number. Please enter your cell phone number and click the verify button.
Step 6 You will receive a verification code on your device. Please enter this verification code on iCareFone Transfer to verify your GBWhatsApp account.
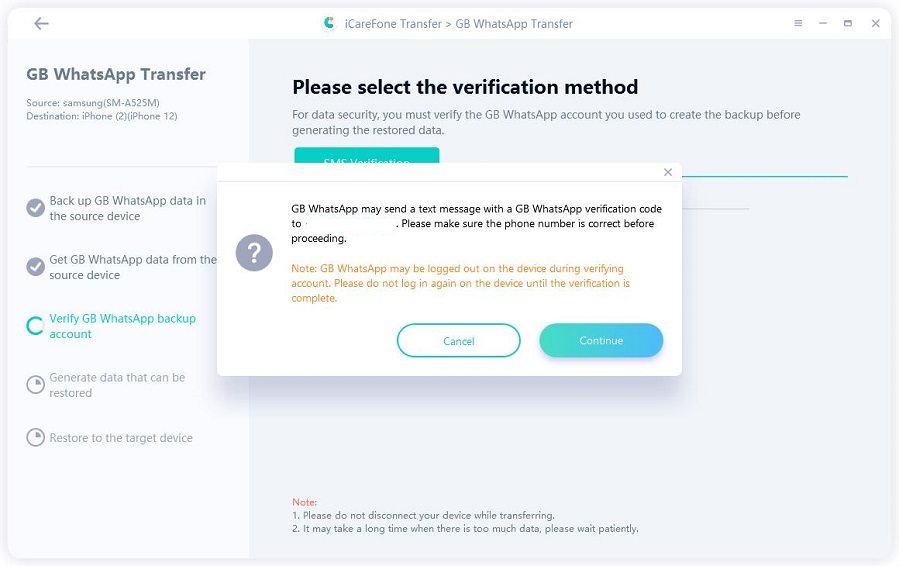
Note: During the verification process, your GBWhatsApp may be logged out from your source device. You can log in again after verification is complete.
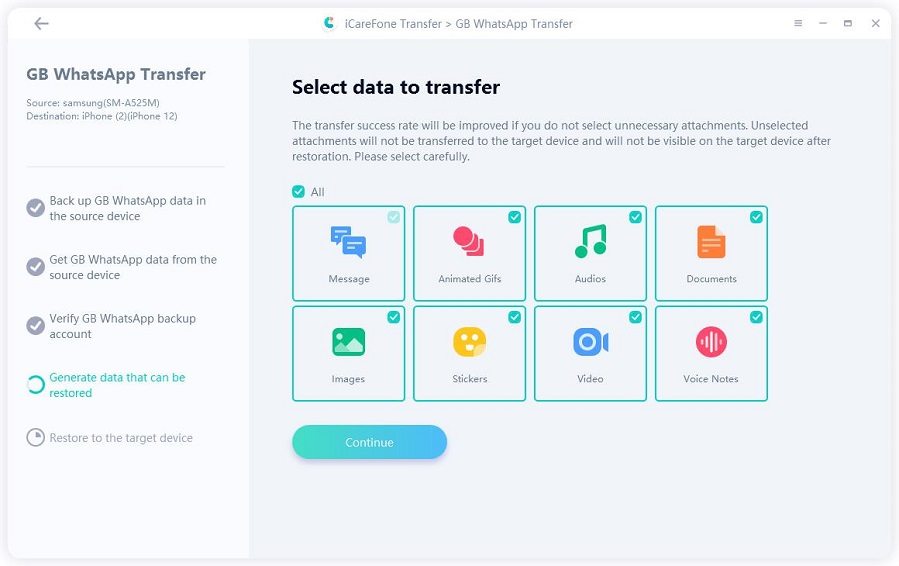
Step 7 After successful verification. You can now decide what kind of GBWhatsApp data you want to transfer. The unselected data type will not be transferred to the target device.
Step 8 Now iCareFone Transfer is generating that can be transferred.
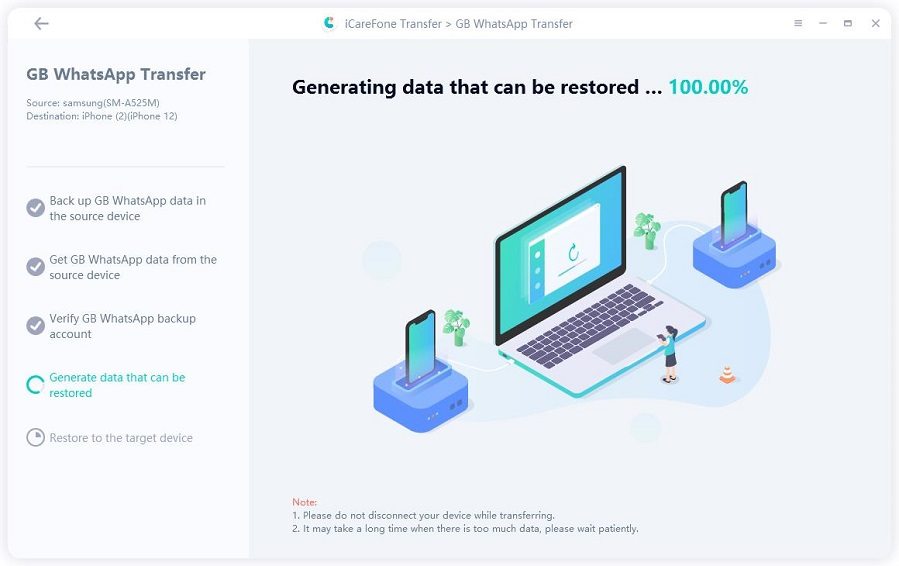
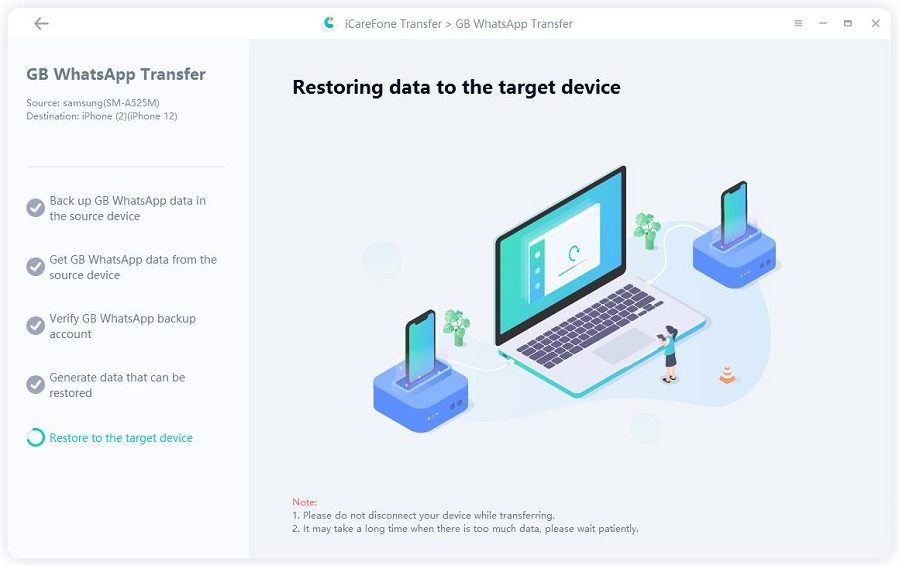
Step 9 iCareFone Transfer is transferring GBWhatsApp data to the target device. Please wait patiently.
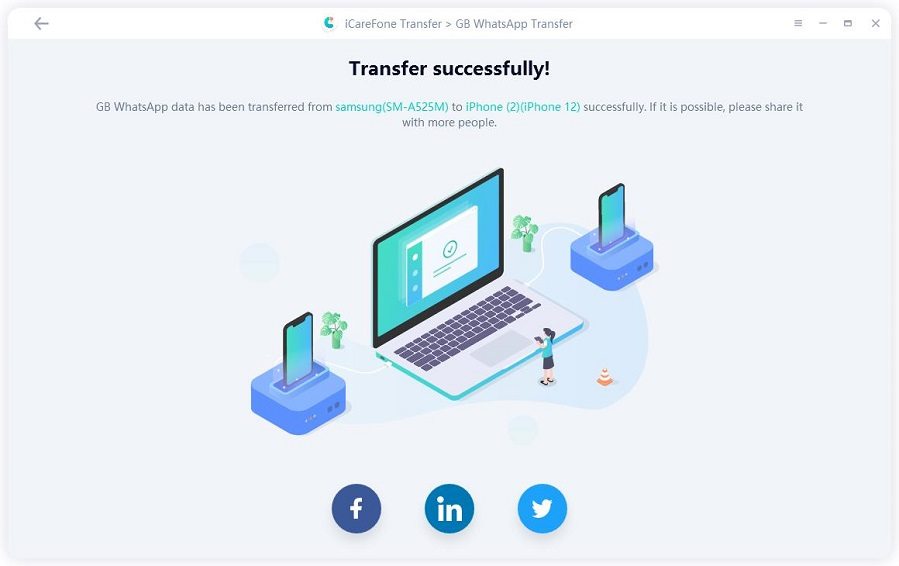
Step 10 Congratulations! Your Android GBWhatsApp data has been successfully transferred to your iOS WhatsApp.
2. Transfer Android GBWhatsApp Data to Android WhatsApp
Step 1 Download and launch Tenorshare iCareFone Transfer on your computer. Choose the GBWhatsApp icon on the main interface.

Step 2 Then connect your Android devices to the computer.
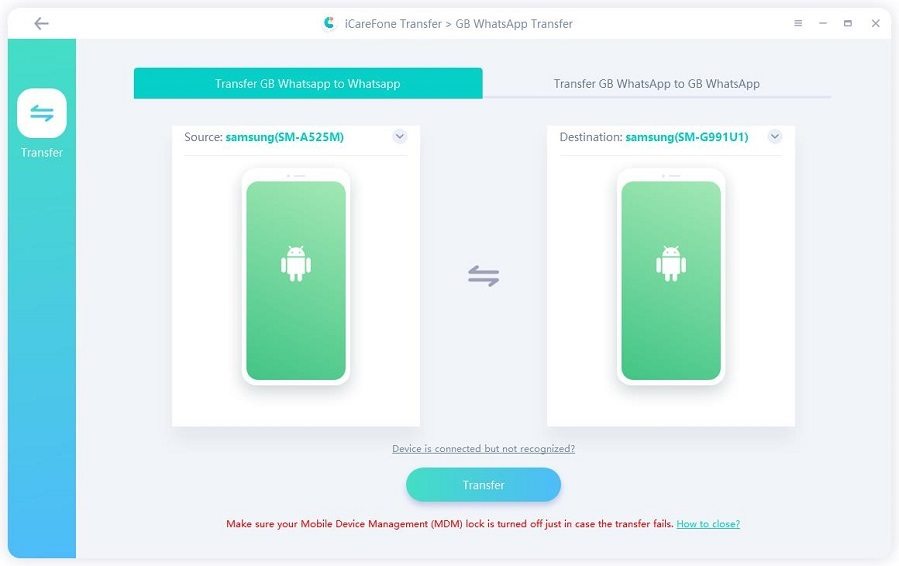
Note: On your Android devices, you may need to enable USB debugging.
Step 3 Now please follow the screenshots’ guide to backup the GBWhatsApp data on your source Android device. When you are done, click Continue.
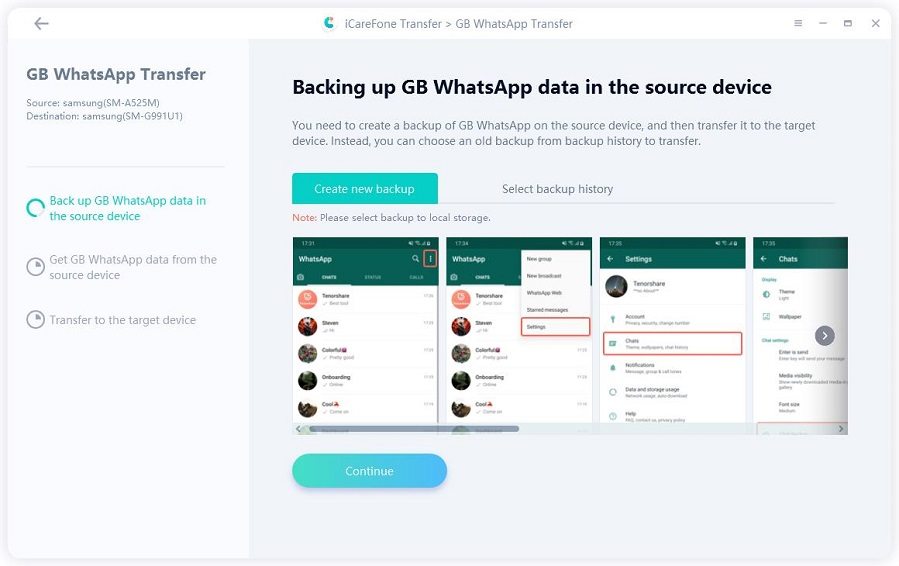
Step 4 iCareFone Transfer is getting GBWhatsApp data from your source device. Please wait for a while and do not disconnect your devices.
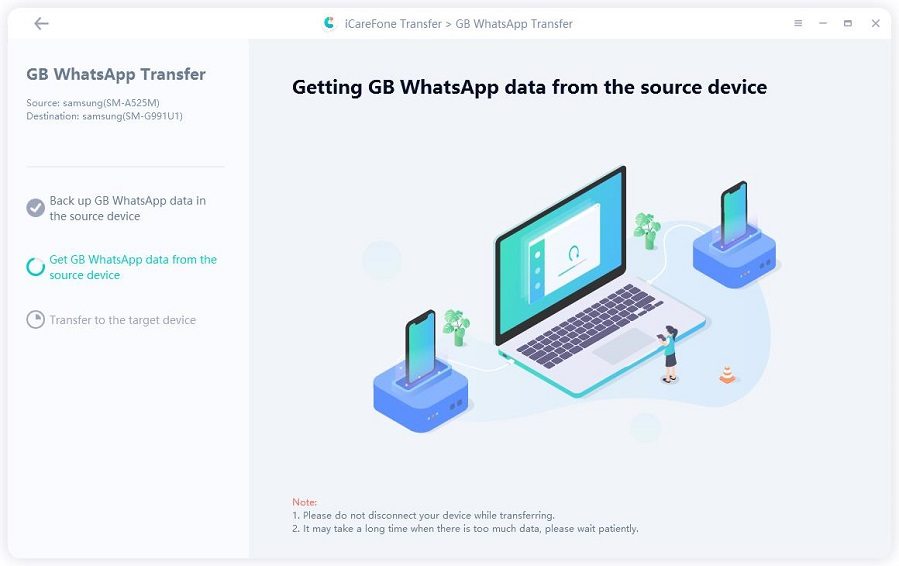
Step 5 Here you can select the GBWhatsApp data type that you want to transfer. The unselected data type will not be transferred to the target device.
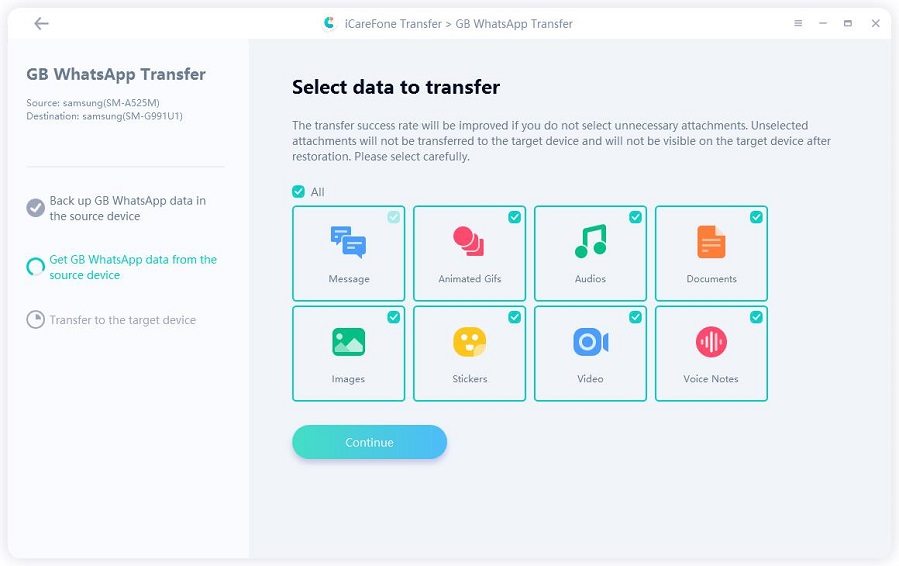
Step 6 Now iCareFone Transfer is transferring GBWhatsApp data to the target device. Please wait patiently and do not disconnect your device during the process.
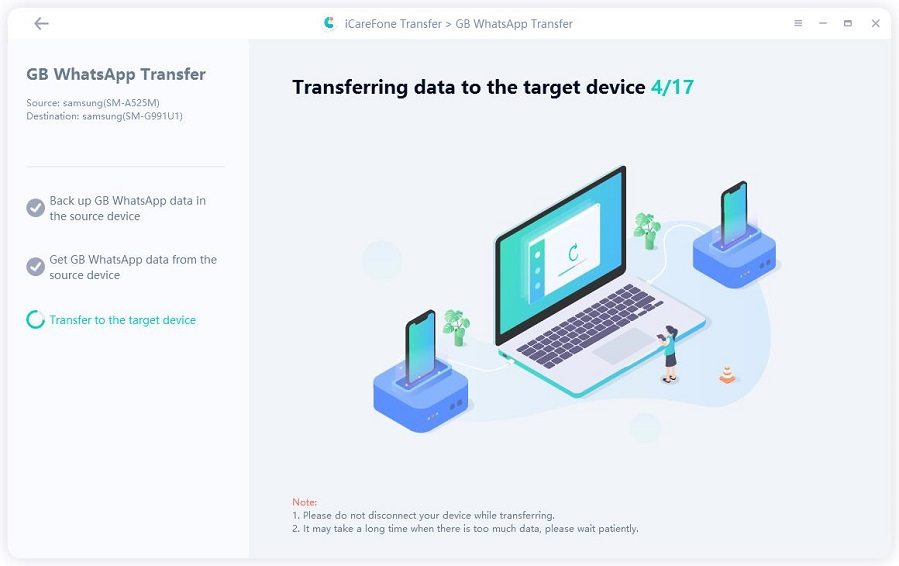
Step 7 Wow! Your Android GBWhatsApp data has been successfully transferred to your Android WhatsApp.
3. Transfer Android GBWhatsApp to New Android Phone
Step 1 Download and launch Tenorshare iCareFone Transfer on your computer. Choose the GBWhatsApp icon on the main interface.

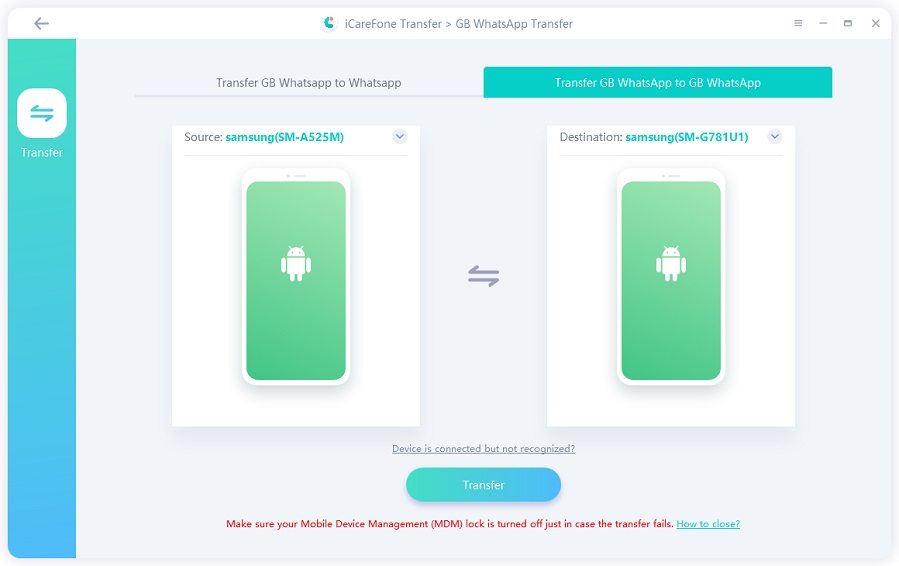
Step 2 Then connect your two Android devices to your computer. You may need to enable USB debugging on your Android devices. Remember to choose “Transfer GBWhatsApp to GBWhatsApp” from the top menu. When all is done, click the Transfer button.
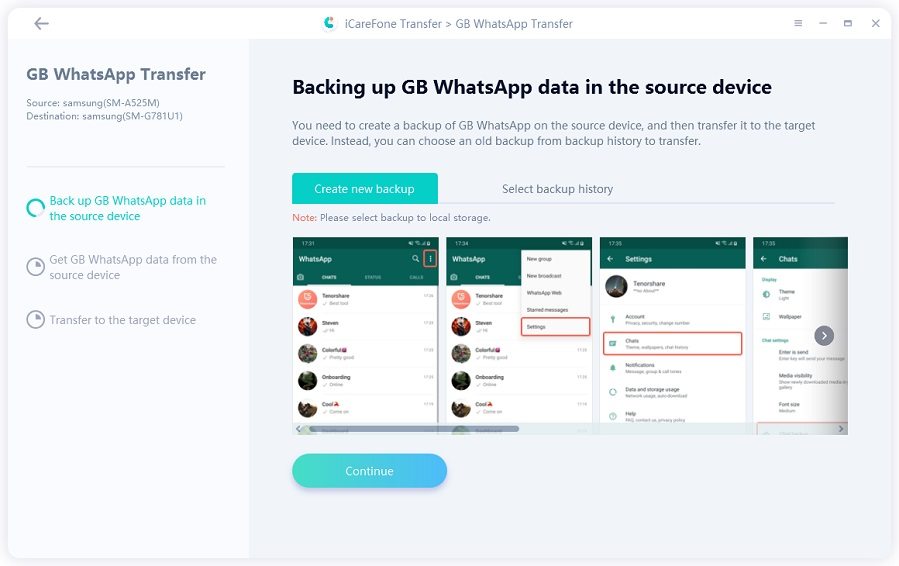
Step 3 Now please follow the steps on the screenshots to backup the GBWhatsApp data on your source Android device. When you are done, click Continue.
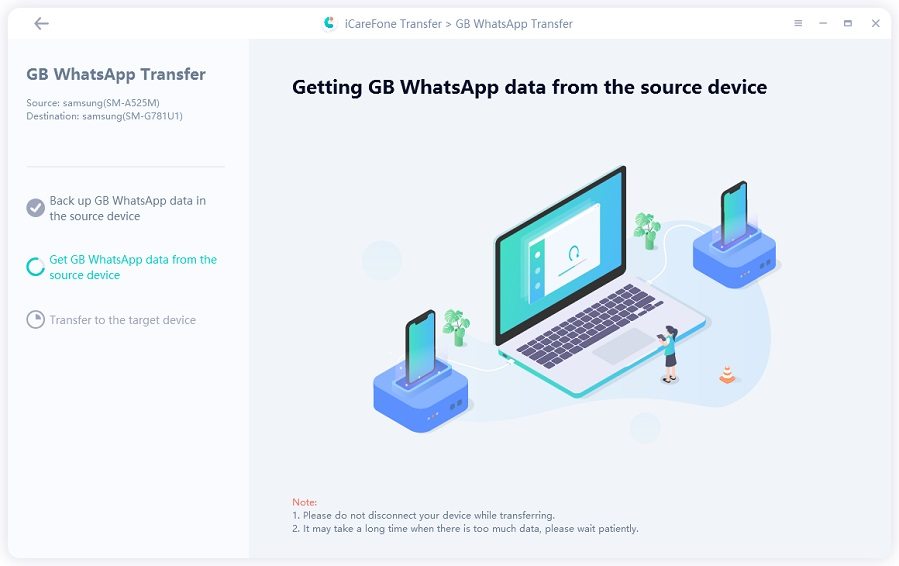
Step 4 iCareFone Transfer is getting GBWhatsApp data from your source device. Please wait for a while and do not disconnect your devices.
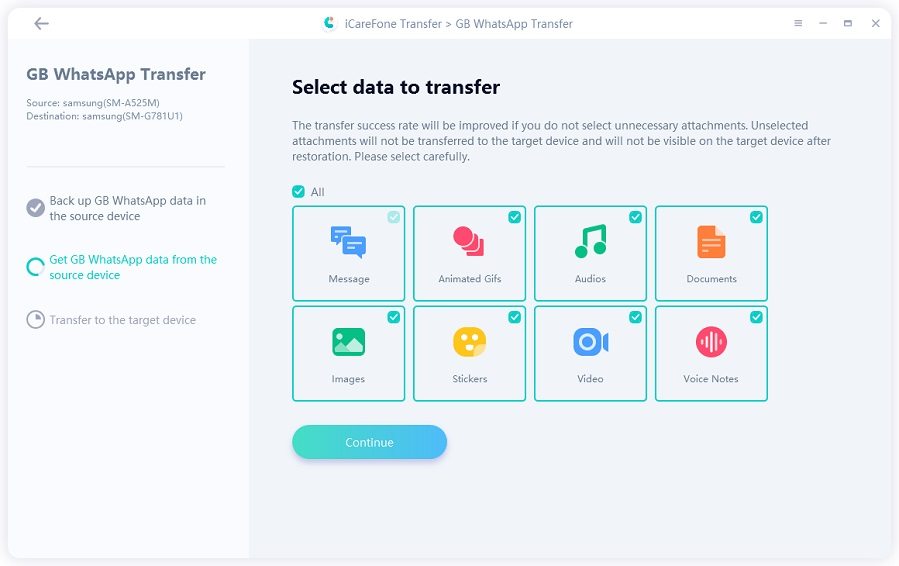
Step 5 Now you can decide what kind of GBWhatsApp data you want to transfer. The unselected data type will not be transferred to the target device.
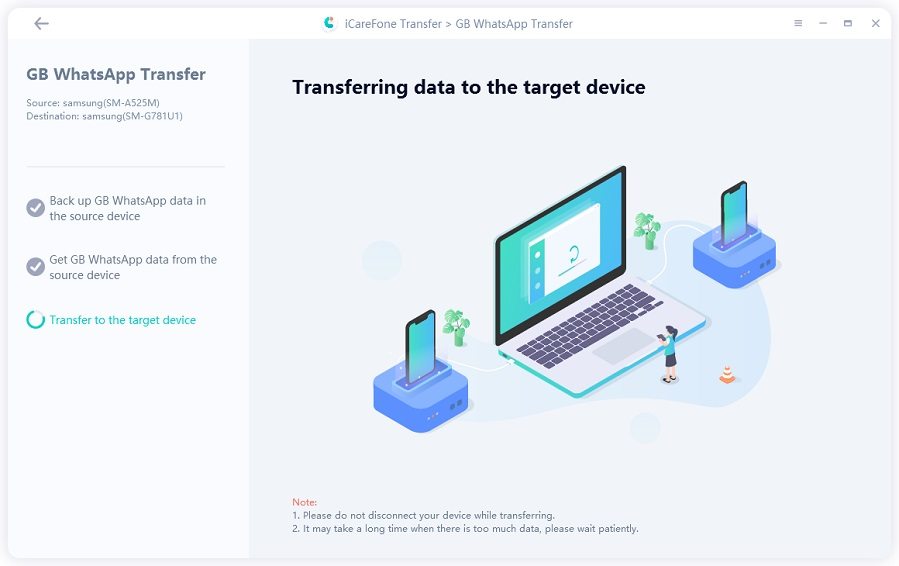
Step 6 The GBWhatsApp data is being transferred, please wait patiently.
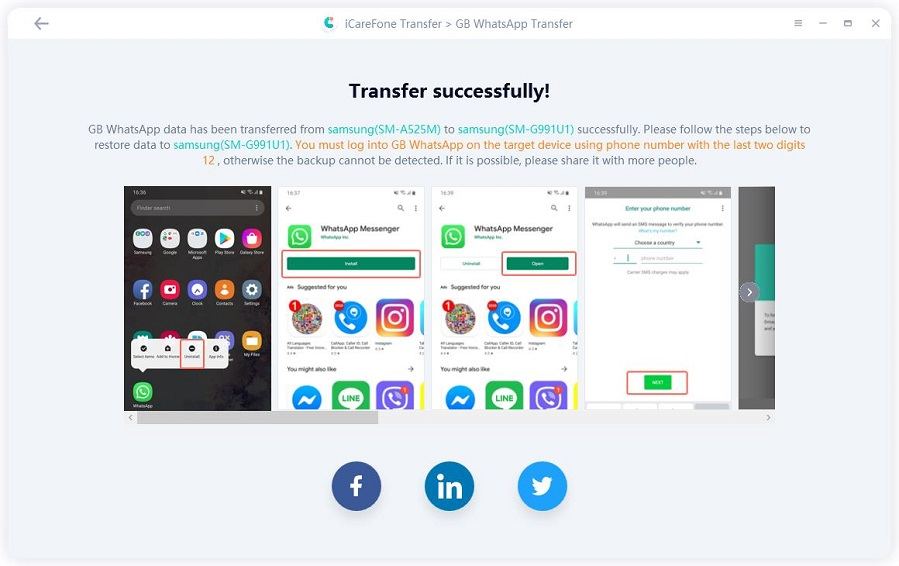
Step 7 Now your GBWhatsApp data has been successfully transferred to your target Android device. You need to follow the on-screen guide to restore data on your target Android device.

Note: The GBWhatsApp account (phone number) on the target device must be the same as the account on your source device.
Part 3. How to Backup And Restore WhatsApp & WhatsApp Business
You should backup WhatsApp data first then you can restore the data to your new iPhone or Android. The ways to backup and restore iPhone/Android WhatsApp are different, please keep reading.
1. How to Back up WhatsApp for iPhone
Step 1 Download and install iCareFone Transfer on PC/Mac and then connect your device with it (Trust required on your iDevice). Click "WhatsApp" icon on the interface.

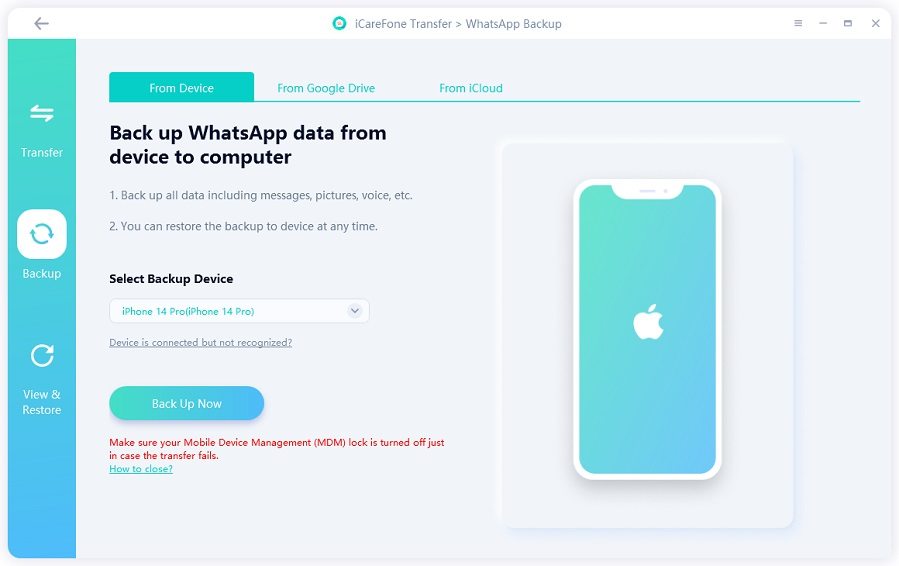
Step 2 Click "Back up" on the side toolbar, and then select the device that you want to back up. Once you have selected, click "Back Up Now" to go on.
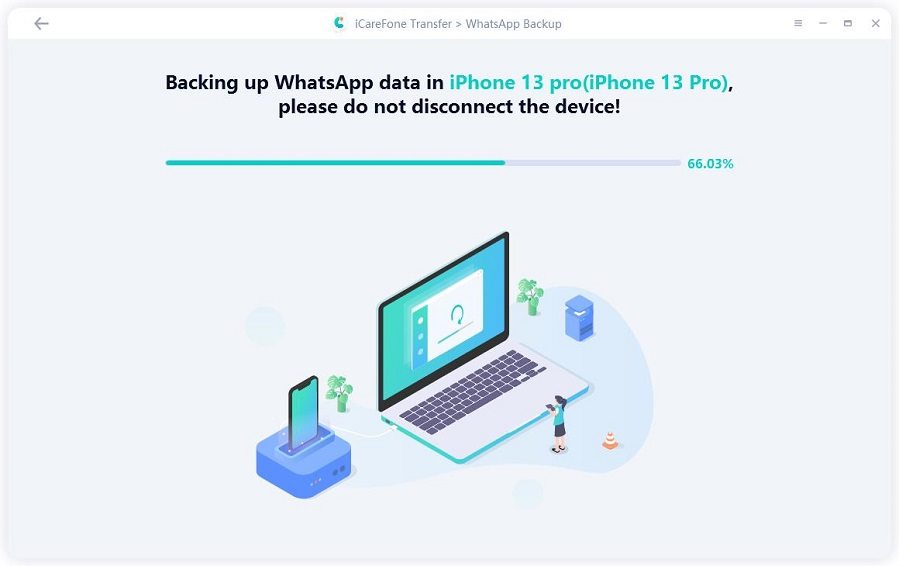
Step 3 The program is backing up WhatsApp data for iPhone. It will take a few minutes depending on the size of backup file. Do not disconnect your device during backup.
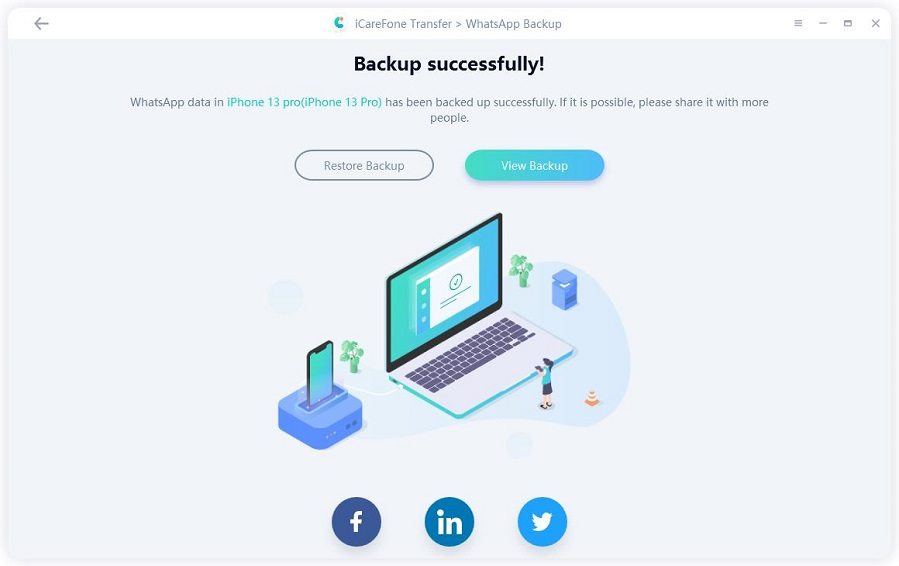
Step 4 When the following interface appears, it means that your WhatsApp data has been backed up successfully on your Mac. You can also review backup and export it.
1.2 How to Back up WhatsApp for Android
Step 1 Download and install iCareFone for WhatsApp on Mac as well as connect with your Android device via a USB cable (Allow USB debugging required).
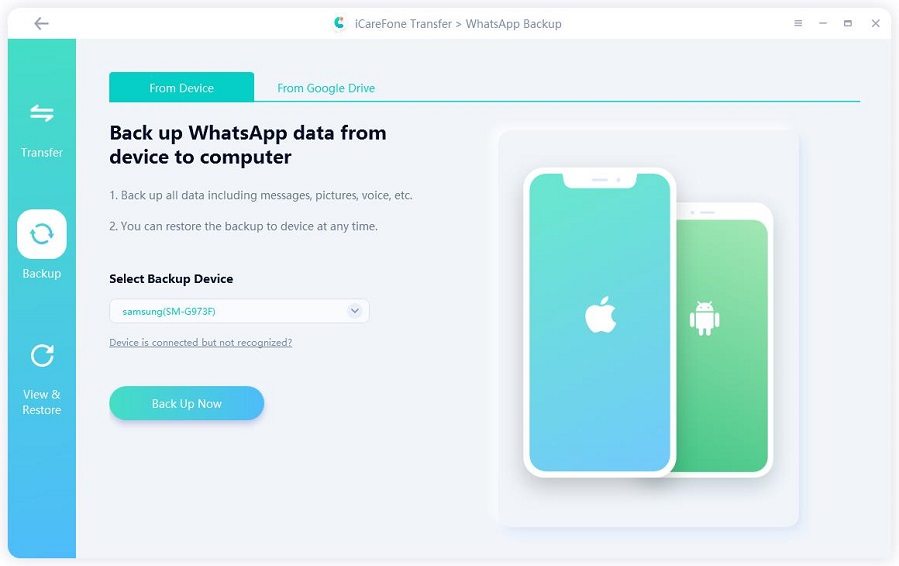
Step 2 Move your mouse to go to "WhatsApp" > "Back up". Then you can use drop down arrow to select Samsung device to back up. Hit "Back up Now".
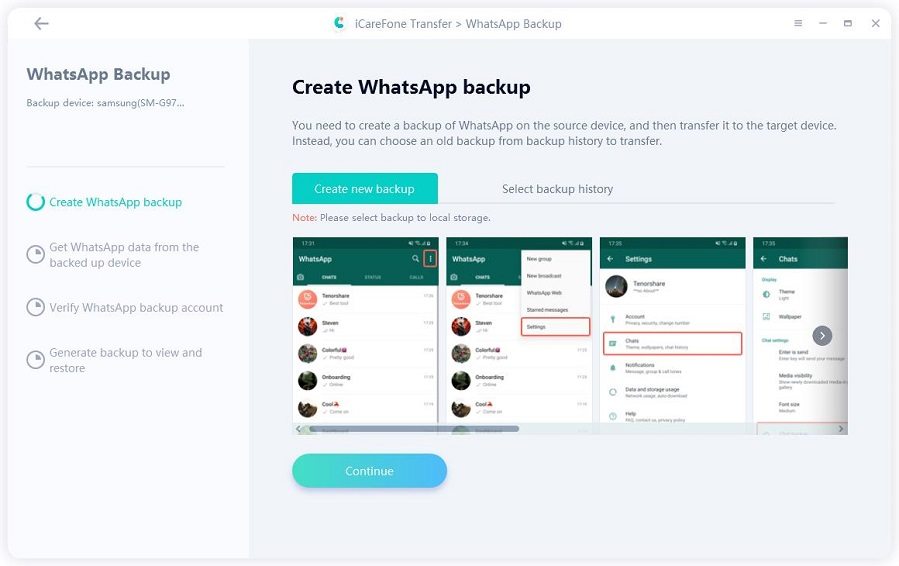
Step 3 You should back up WhatsApp data on your source device by following the screenshots. If you did, click "Continue".
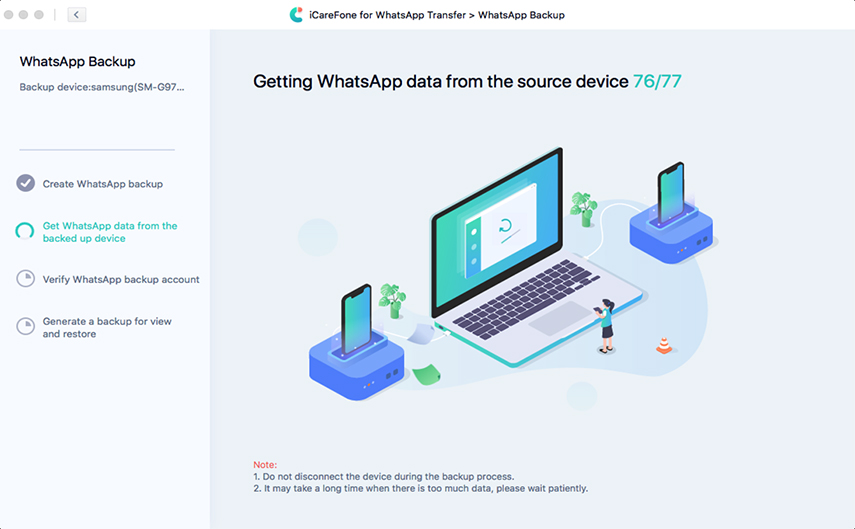
Step 4 Then the program is getting WhatsApp data from the source device. Please wait for all data to be obtained successfully.
Step 5 After it finished, you should verify the WhatsApp backup account through typing correct country code and phone number. Then press "Verify".
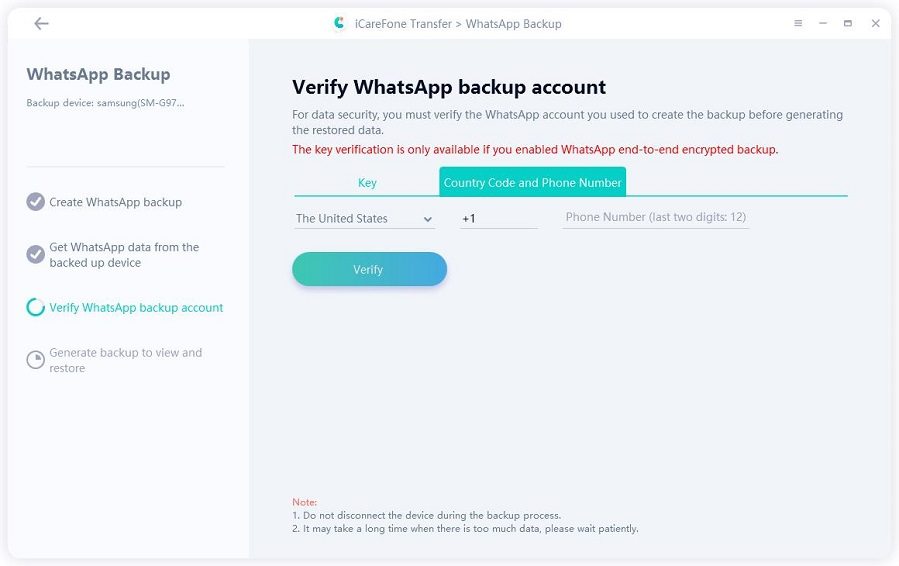
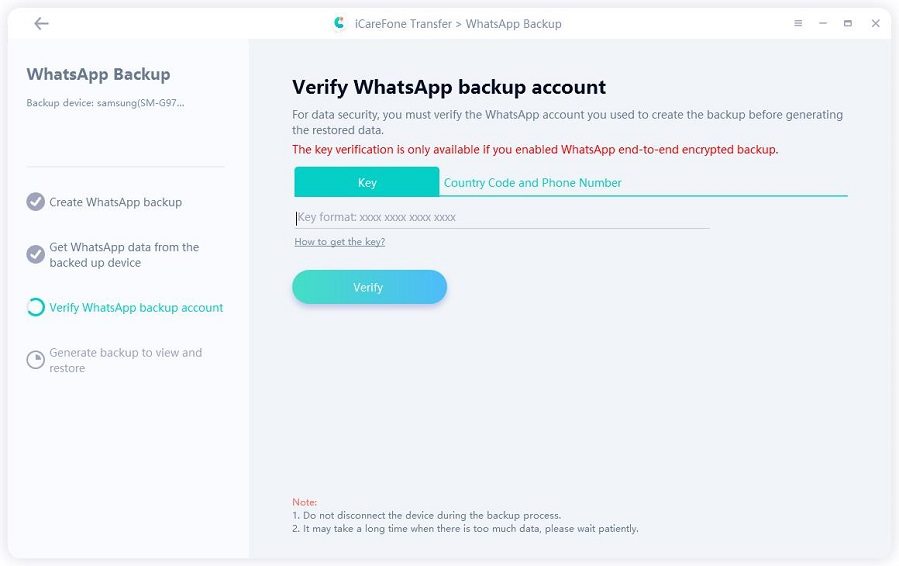
Note: If you’ve enabled WhatsApp end-to-end encrypted backup, you can also verify your WhatsApp backup account by entering the 64-digit key.
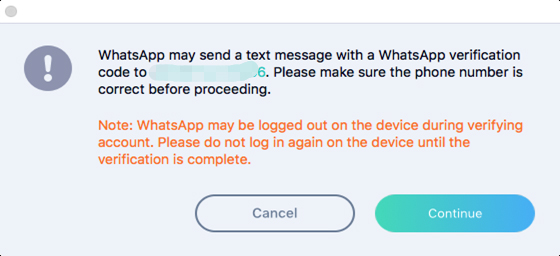
Tips:
A pop-up window to verify your account will prompt you to the country code and number. Click "Continue".
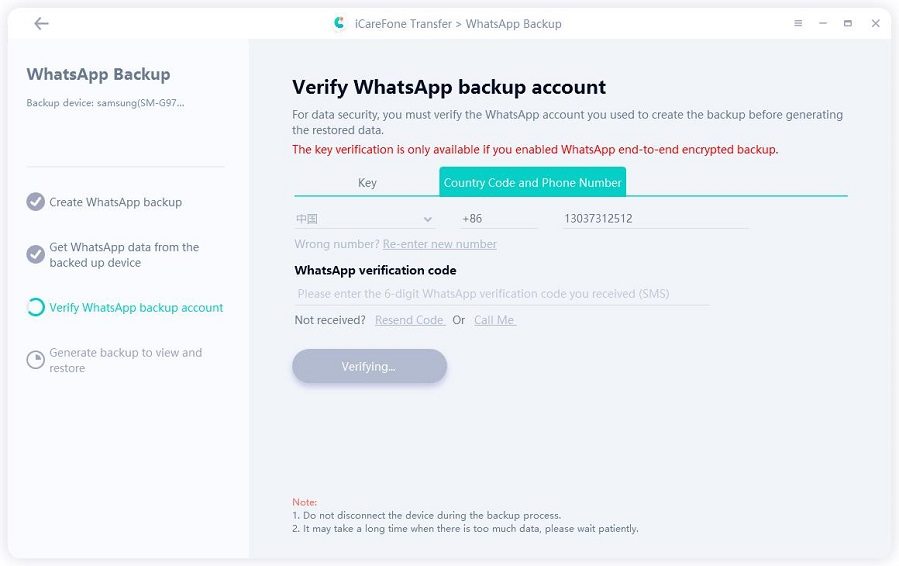
Step 6 When you get the verification code from WhatsApp official, please enter them on the blank line. Tap "Verify" again.
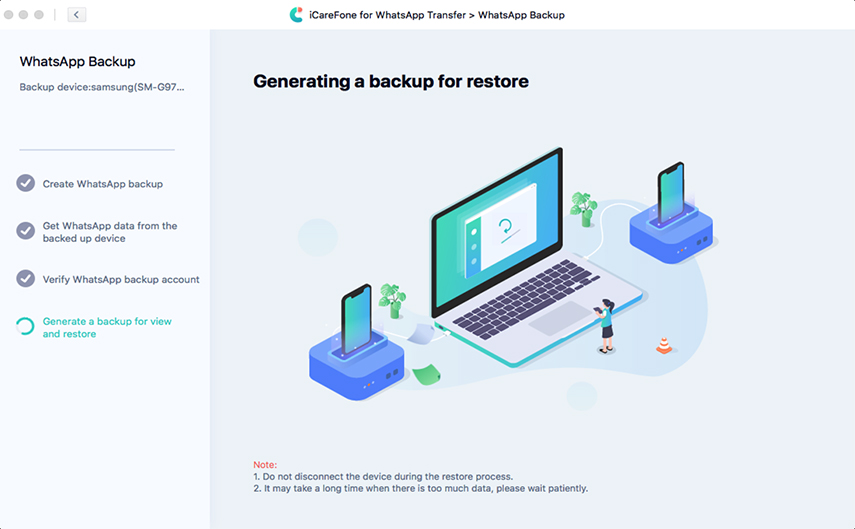
Step 7 After the verification is successful, the program automatically starts to generate WhatsApp backup for restoration.
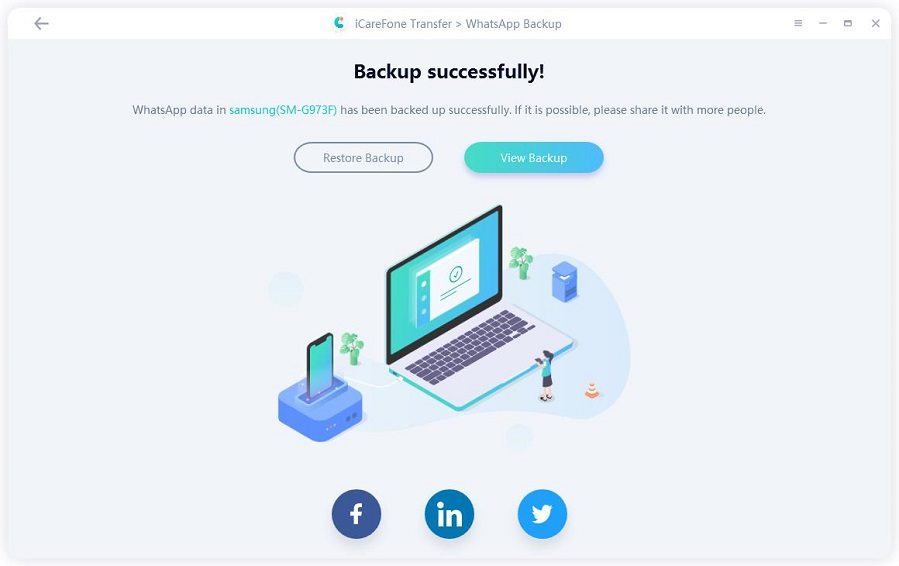
Step 8 You will get the following interface when your WhatsApp data has been backed up successfully.
2. How to Restore WhatsApp to iPhone
Step 1 Download and install iCareFone Transfer on your computer, then Connect the device on which you wish to restore your WhatsApp data(Trust required on your iDevice). Hit "WhatsApp" icon.

Note: Trust required: Please unlock your device and trust this computer.
Step 2 On the left toolbar, click "View & Restore" and you'll see some WhatsApp data that was previously backed up using this tool. Select one which you want to restore, and then click "Restore to iOS".
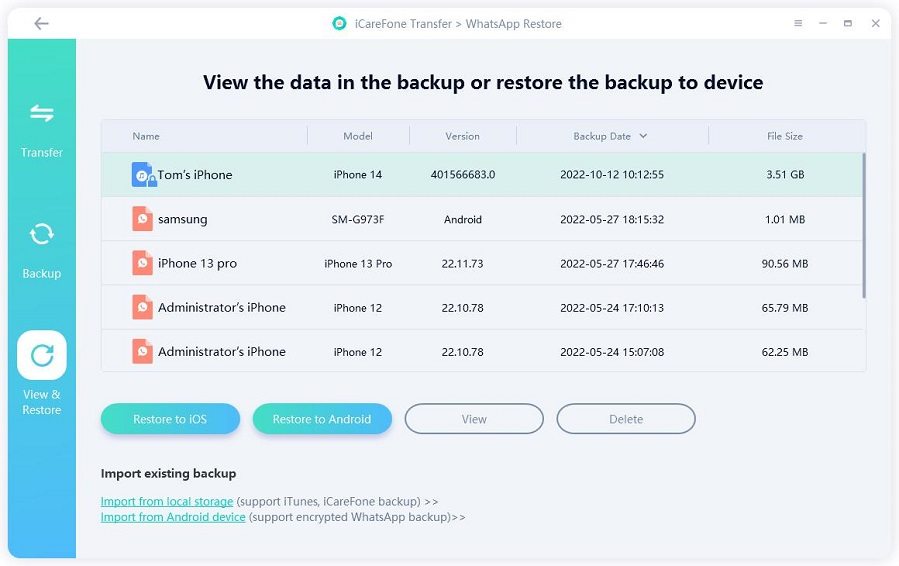
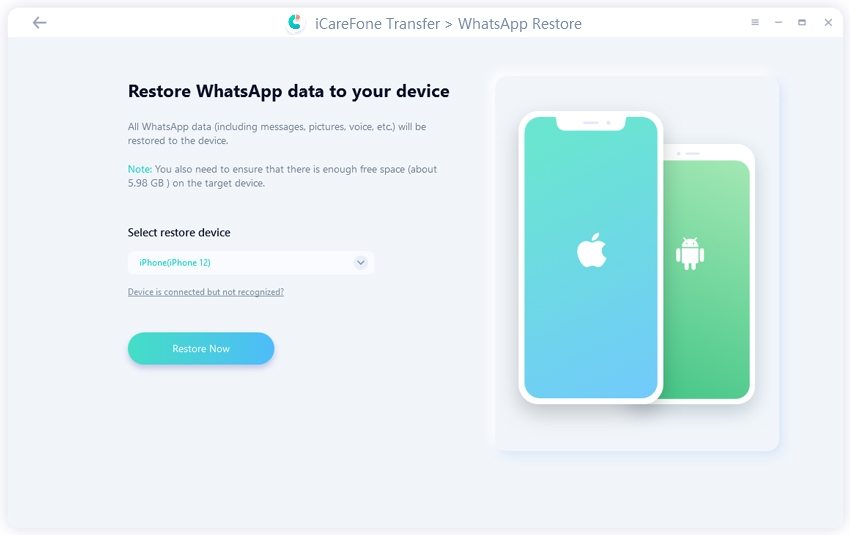
Step 3 Once you have chosen the backup file you want, then click "Restore Now".
Notes:
-
The window pops up to remind that your previous WhatsApp data will be overwritten. If there is no problem, then click "Continue" to move on.

-
Make sure that your target iPhone device has already installed WhatsApp and logged in before the restore process start. Otherwise, that data will be invisible.

-
Before restoring process, please remember to turn off your "Find My iPhone" on your iCloud settings of your device.

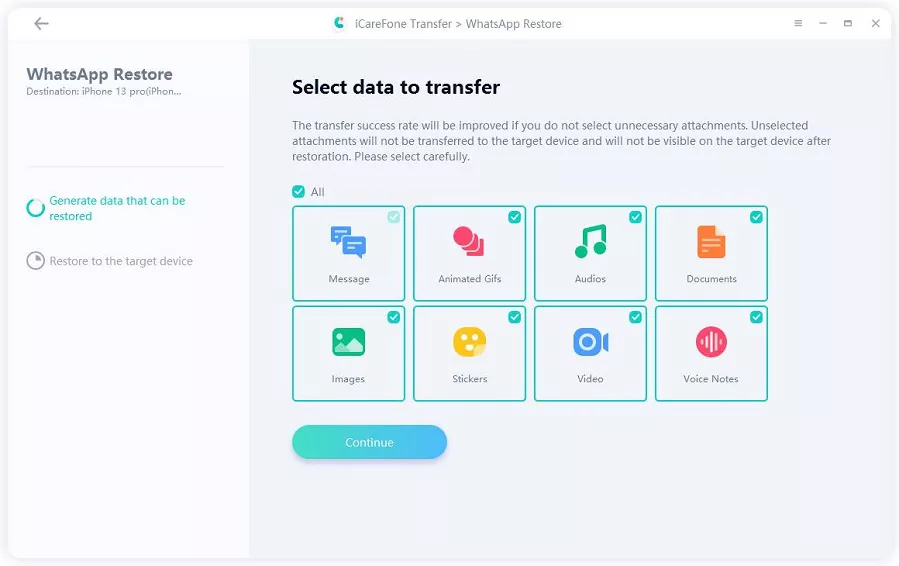
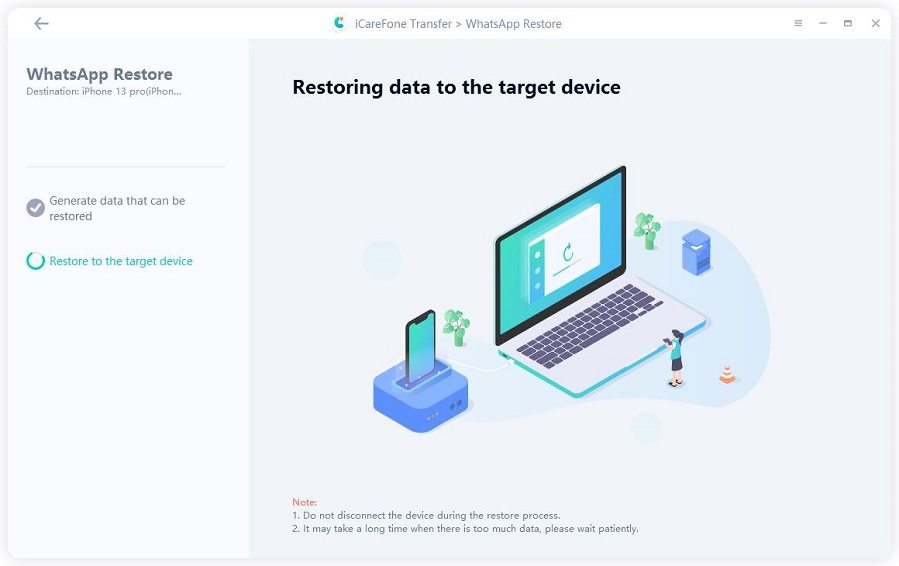
Step 4 Please select the type of attachment you need to restore and click Continue. The process of restoring is launching and please do not disconnect your device during the process. And the speed depends on your data size so please be patient if there is a large amount of your data.
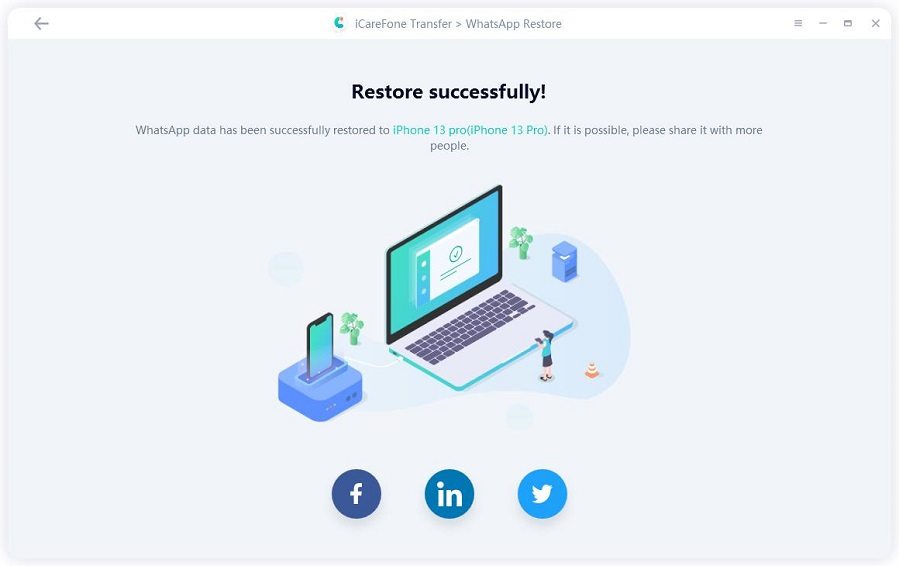
Step 5 When the process completed, it means that your WhatsApp backup data are restored to your iPhone successfully.
2.1. How to Restore WhatsApp to Android
Step 1 Launch iCareFone Transfer on Mac. On the interface, go to "WhatsApp" > "View & Restore". Select the Android backup file, then hit "Restore to Android".
Step 2 Make sure that you have select the correct Android backup file. If yes, click "Restore Now".
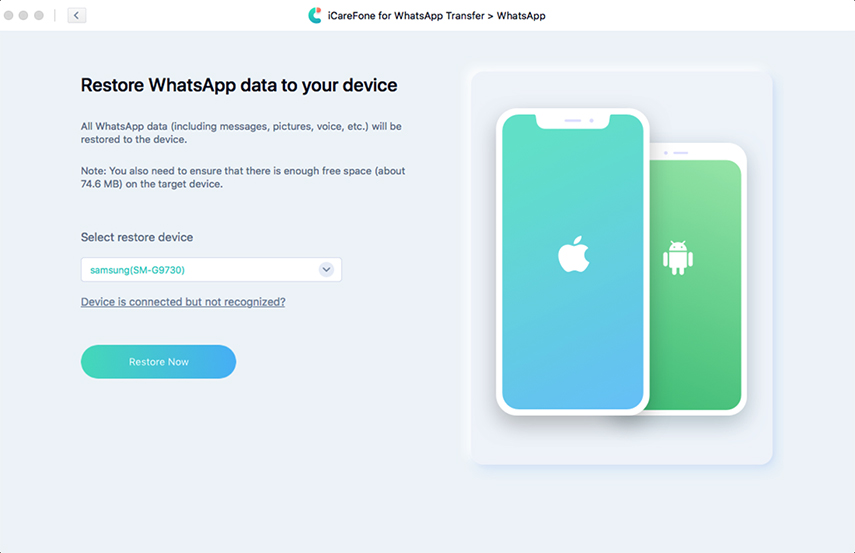
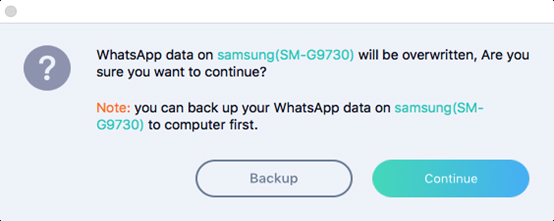
Note: The program will overwrite your WhatsApp data on android. If there is no problem, click "Continue".
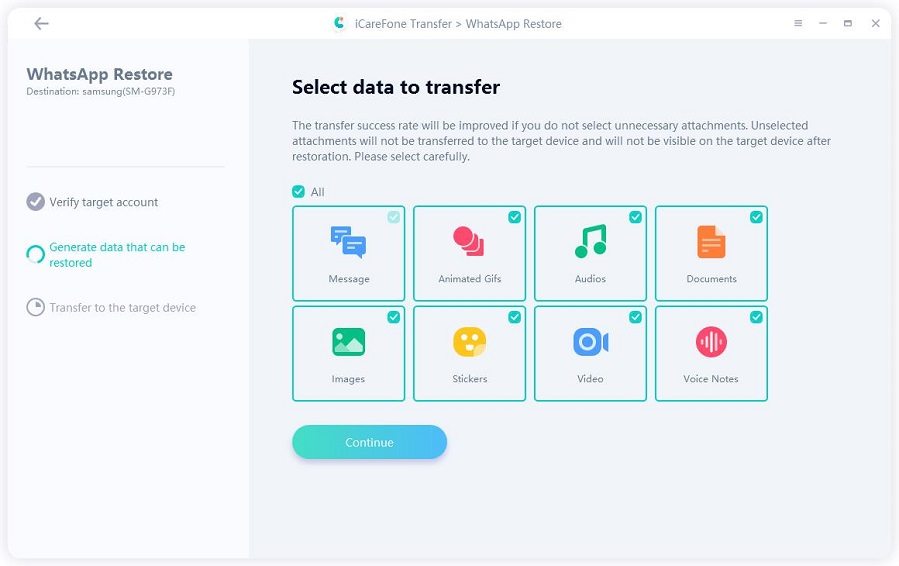
Step 3 You can select the type of attachment you need to restore. Unselected attachments will not be restored to the target device. Click "Continue" to proceed to the next step.
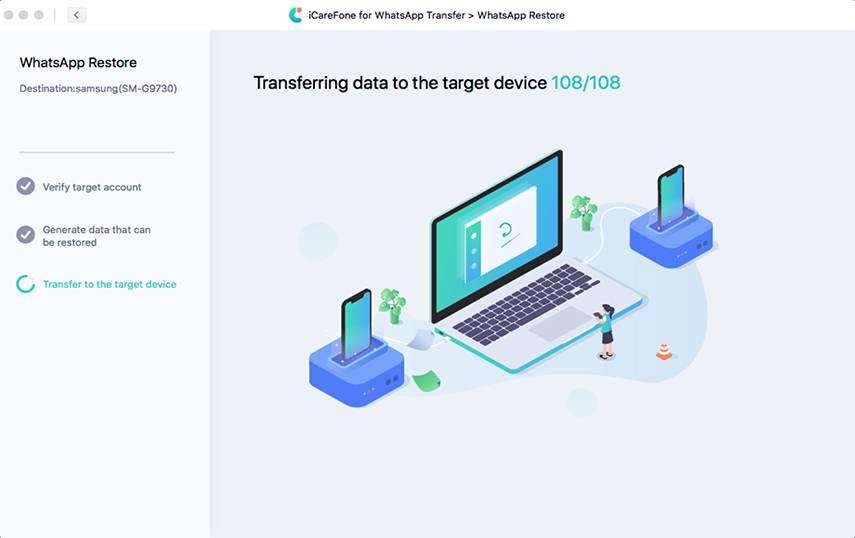
Step 4 The program will quickly find the backup file for your Android, and then start to transfer data to your Android device.
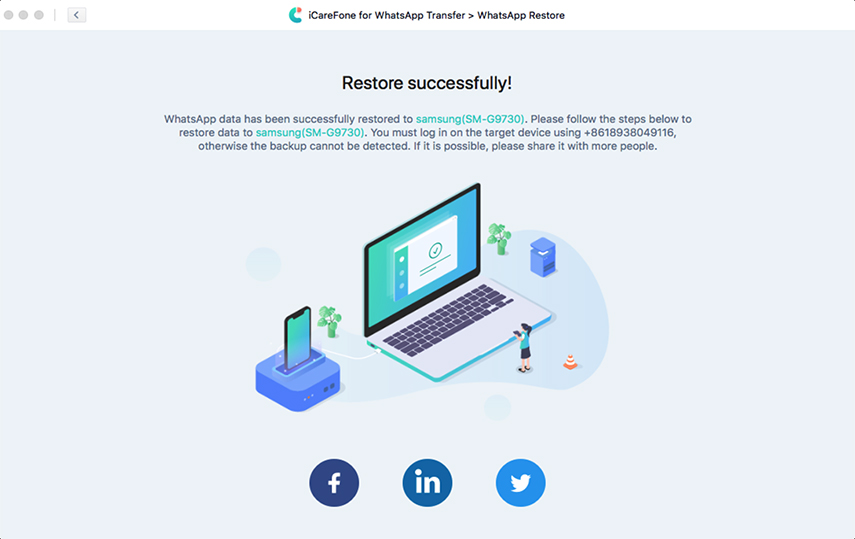
Step 5 Once the backup data you want has been restored to your Android successfully, you will get the interface below.
Part 4: GBWhatsApp Backup and Restore
- 1. GBWhatsApp Chats Backup
- 2. Restore GBWhatsApp Backup to WhatsApp
- 3. Restore GBWhatsApp Backup to GBWhatsApp
1. GBWhatsApp Chats Backup
Download and install iCareFone Transfer on PC/Mac and then connect your device with it (Trust required on your iDevice). Click "GBWhatsApp" icon on the main interface.

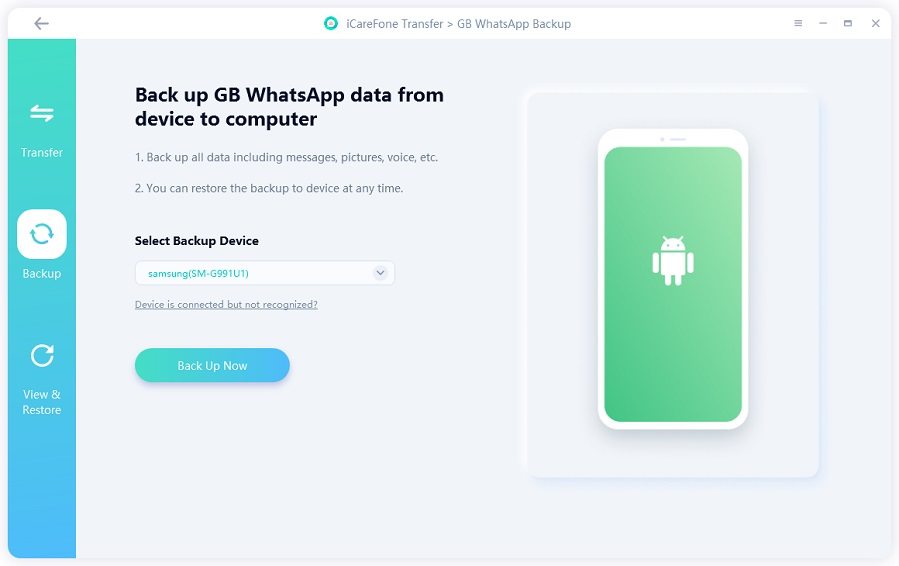
From the toolbar on the left, click "Backup," and then pick the device you wish to back up. After making your choice, move forward by clicking "Back Up Now".

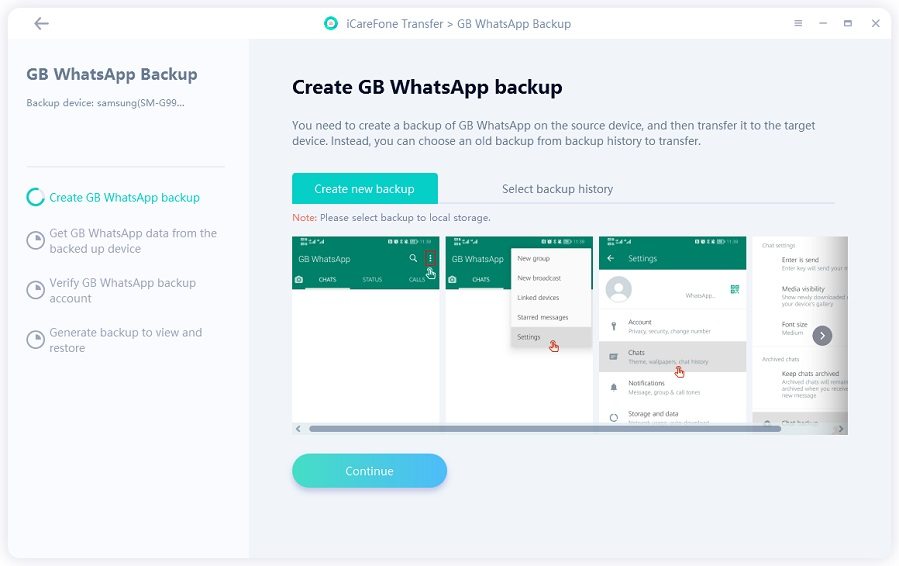
Now you need to follow the screenshot instructions below to create a GBWhatsApp backup on your device.

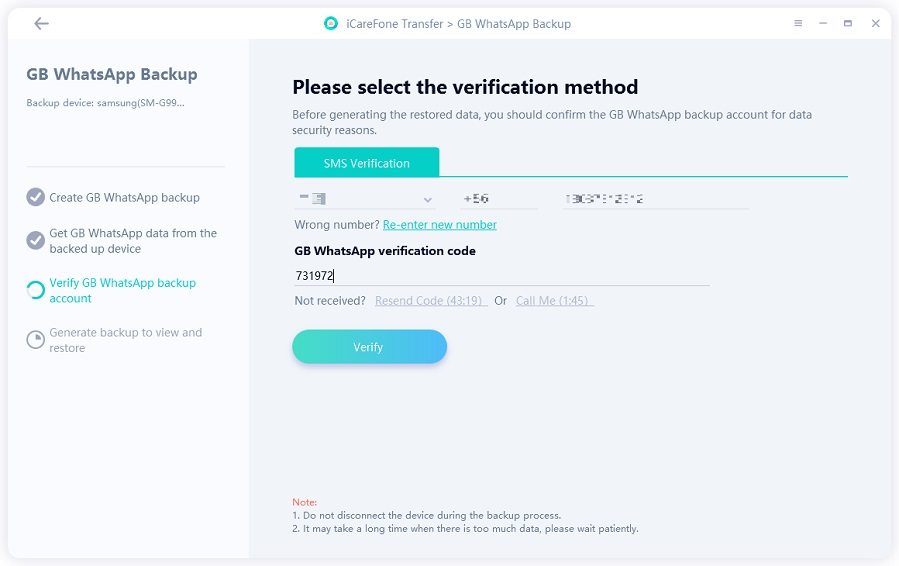
iCareFone Transfer is getting GBWhatsApp backup data from your device. Please wait for a while and do not disconnect your devices.

Now you need to verify the phone number of your GBWhatsApp backup account. You can verify your account by selecting "Send verification code" or "Call me". (It is recommended to use "Call me").

When you’ve completed the verification. The program will generate GBWhatsApp data that can be backed up or viewed.

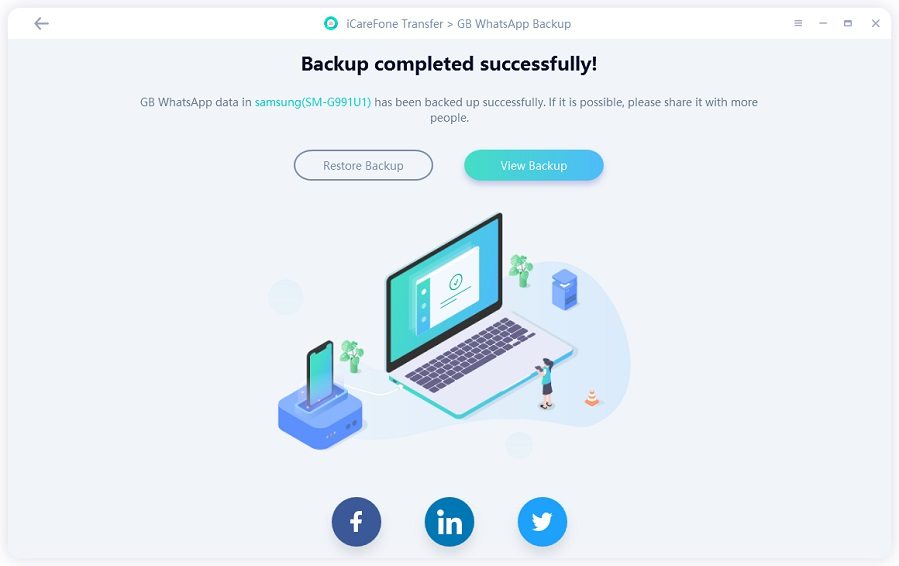
Within minutes, your GBWhatsApp data will be successfully backed up to your computer. You can view or restore your GBWhatsApp data at any time.

2. Restore GBWhatsApp Backup to WhatsApp
Download and install iCareFone Transfer to your computer, then Connect the device on which you wish to restore your GBWhatsApp data. Click on the "GBWhatsApp" icon.

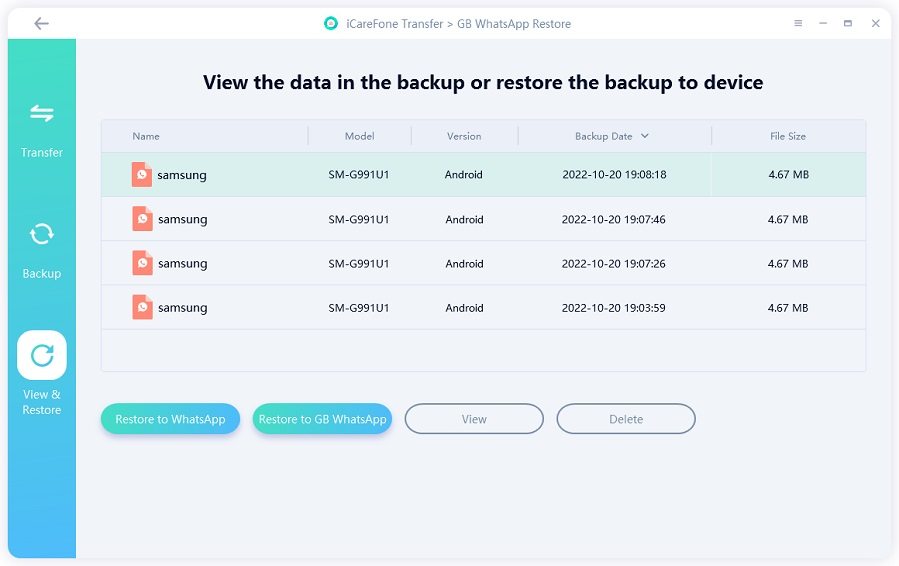
On the left toolbar, click "View & Restore" and you'll see some GBWhatsApp backup data that was previously backed up using this tool. Select one which you want to restore, and then click "View" (or choose “Restore to WhatsApp” if you do not want to view the data).

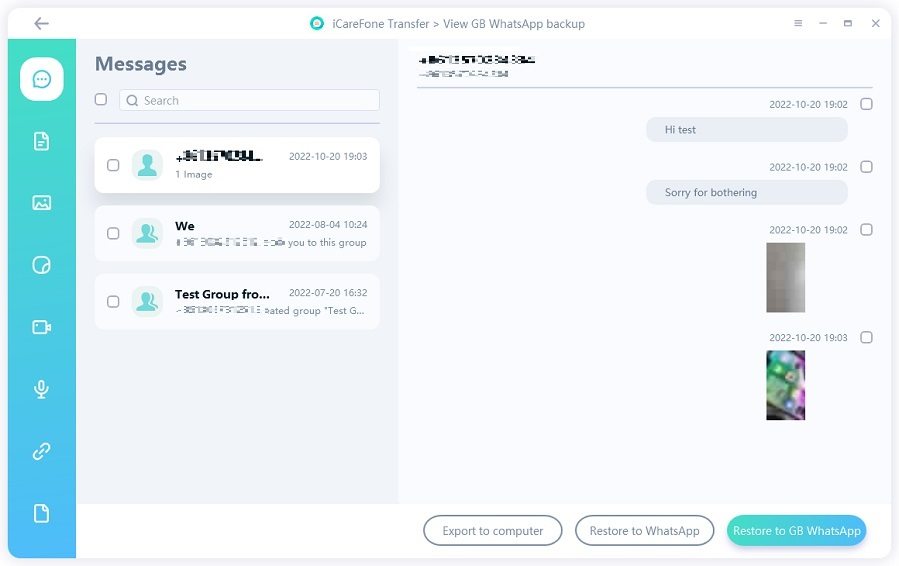
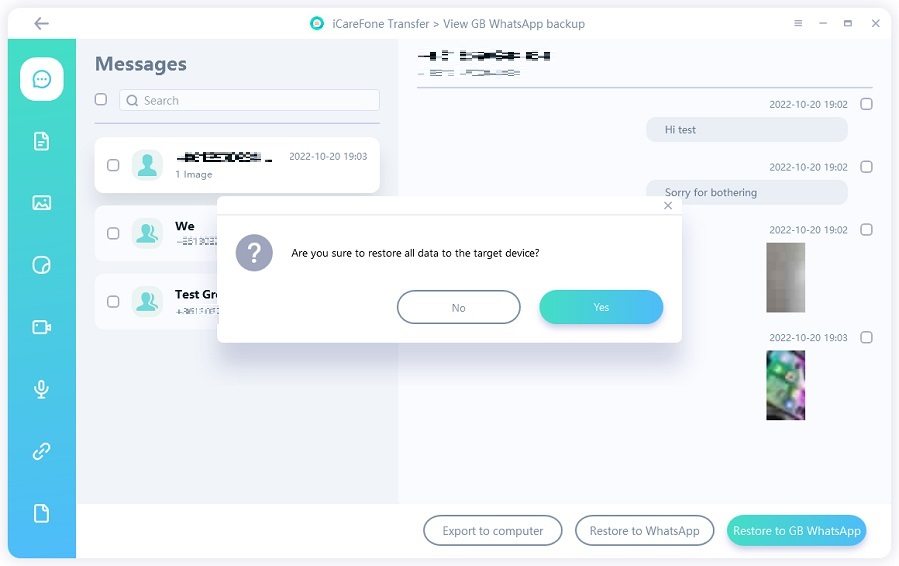
Now you can see all your GBWhatsApp backup data. Choose “Restore to WhatsApp” to continue.


Read the notes on this page and then click on “Restore Now”.

Note: There’s a reminder that your previous WhatsApp data will be overwritten. If there is no problem, then click "Continue" to move on.

Now iCareFone Transfer is generating GBWhatsApp data. You can select the type of GBWhatsApp data you want to restore. When you’ve selected the data, the program will generate data again.


Make sure you’ve logged into WhatsApp on your device.

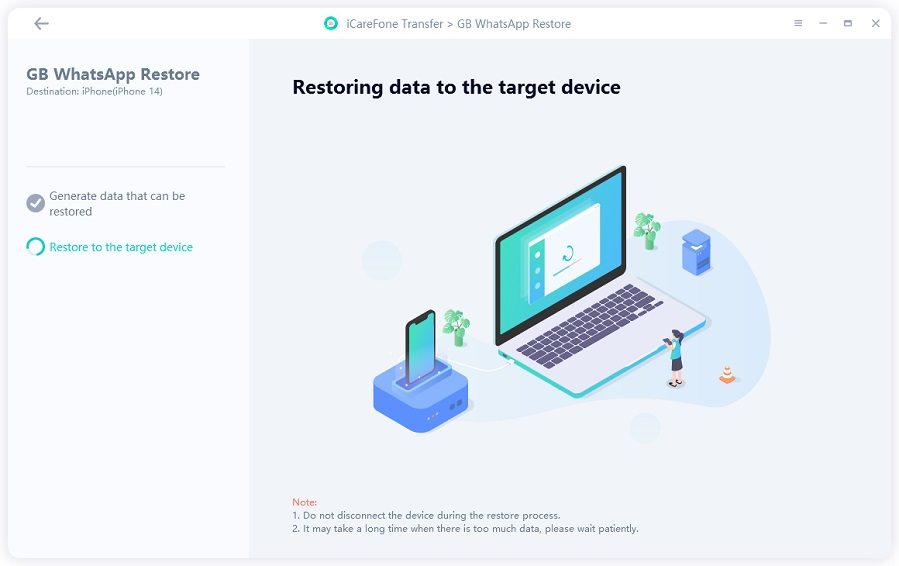
iCareFone Transfer is restoring the GBWhatsApp backup data to the normal WhatsApp.

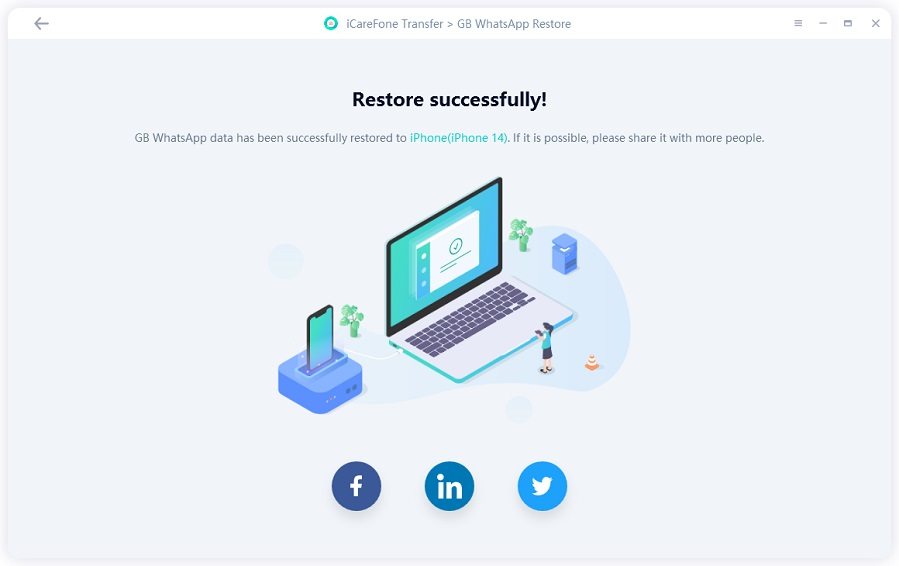
Within seconds, your GBWhatsApp data will be restored to WhatsApp successfully!

3. Restore GBWhatsApp Backup to GBWhatsApp
Download and install iCareFone Transfer to your computer, then Connect the device on which you wish to restore your GBWhatsApp data. Click on the "GBWhatsApp" icon.

On the left toolbar, click "View & Restore" and you'll see some GBWhatsApp backup data that was previously backed up using this tool. Select one which you want to restore, and then click "View" (or choose “Restore to GBWhatsApp” if you do not want to view the data).

Now you can see all your GBWhatsApp backup data. Choose “Restore to GBWhatsApp” to continue.

Read the notes on this page and then click on “Restore Now”.

Note: There’s a reminder that your previous GBWhatsApp data will be overwritten. If there is no problem, then click "Continue" to move on.

Now you need to verify the phone number of your GBWhatsApp backup account. You can verify your account by selecting "Send verification code" or "Call me". (It is recommended to use "Call me").

Please select the type of GBWhatsApp data you want to restore.

iCareFone Transfer is restoring the GBWhatsApp backup data to the target GBWhatsApp.

Within seconds, your GBWhatsApp data will be restored to the target GBWhatsApp successfully!

Part 5. How to Export WhatsApp & WhatsApp Business Chats/Contacts/Media Files
iCareFone Transfer allows you export WhatsApp/WhatsApp Business messages and links to HTML, and contacts, photos, videos, audios can be exported to file format. You can also view the data before exporting.
Note: Before exporting, you should backup your WhatsApp or WhatsApp Business data first.
1. How to Export WhatsApp Chats
Step 1 Launch iCareFone Transfer, click "View & Restore". You will see the backup files, click it.
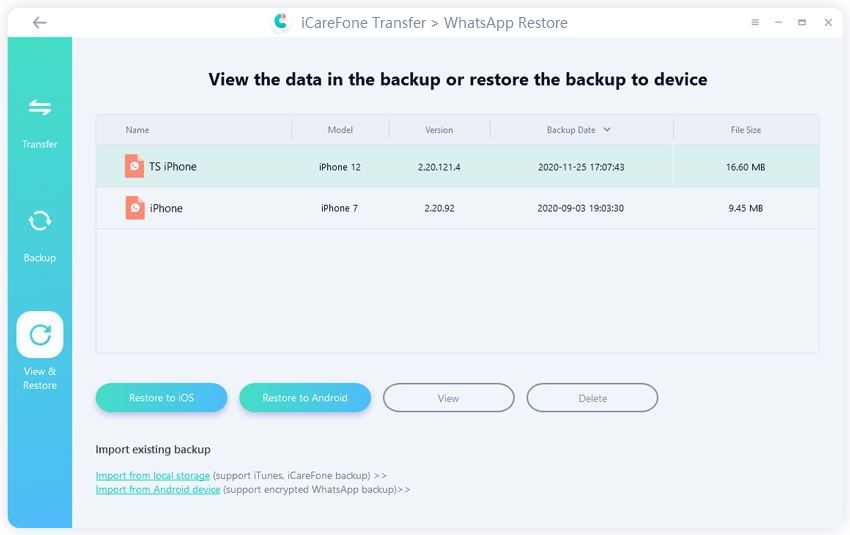
Step 2 Next, click "View" to select WhatsApp chtas to export.
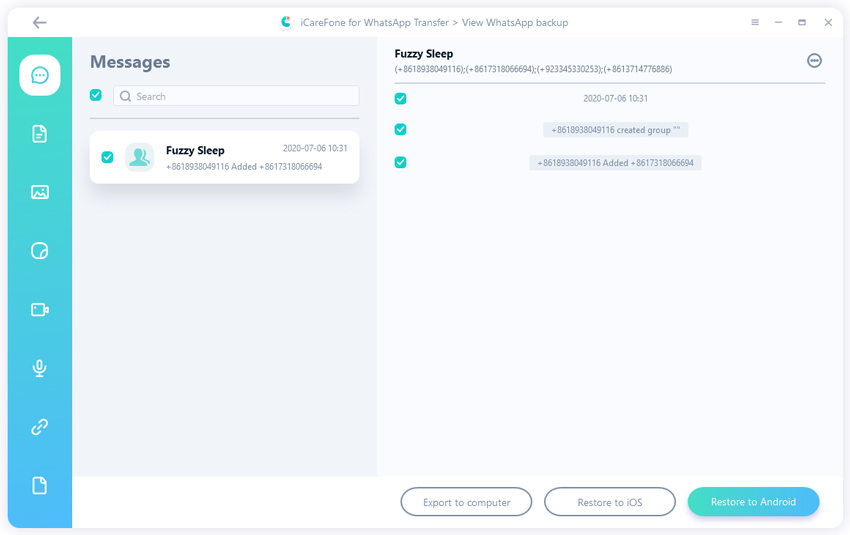
Step 3 Then, click the "Messages" icon, all the messages will be listed. Select them and click "Export to computer".
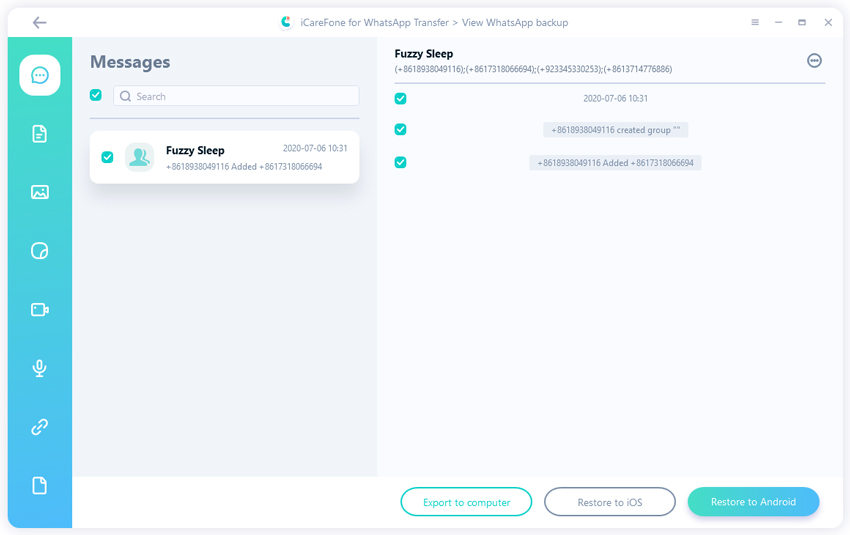
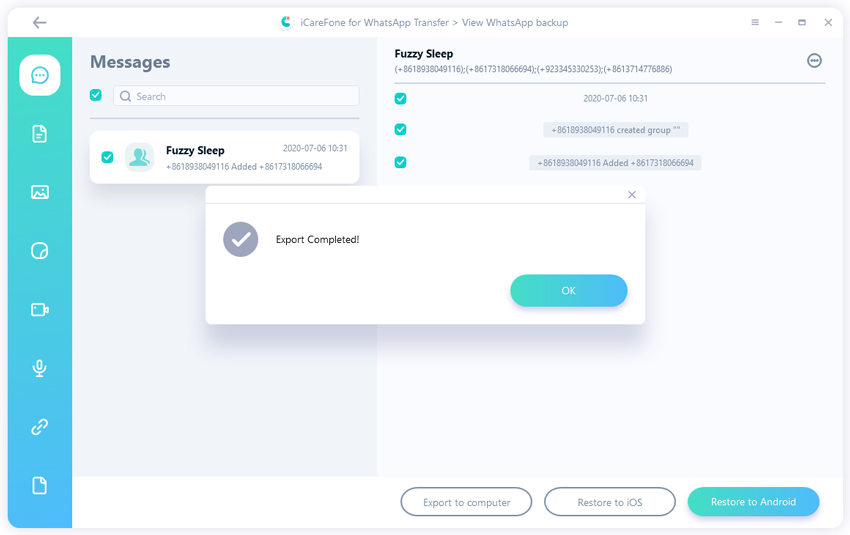
Step 4 Next, select the folder where to store the WhatsApp chats, then done.
2. How to Export WhatsApp Media Files
Here, we will show you how to export photos as example. The ways to export other media files are the same with export photos.
Step 1 Repeat the first and second steps of the previous section, then select "Photos" icon, slect the photos you want to export.
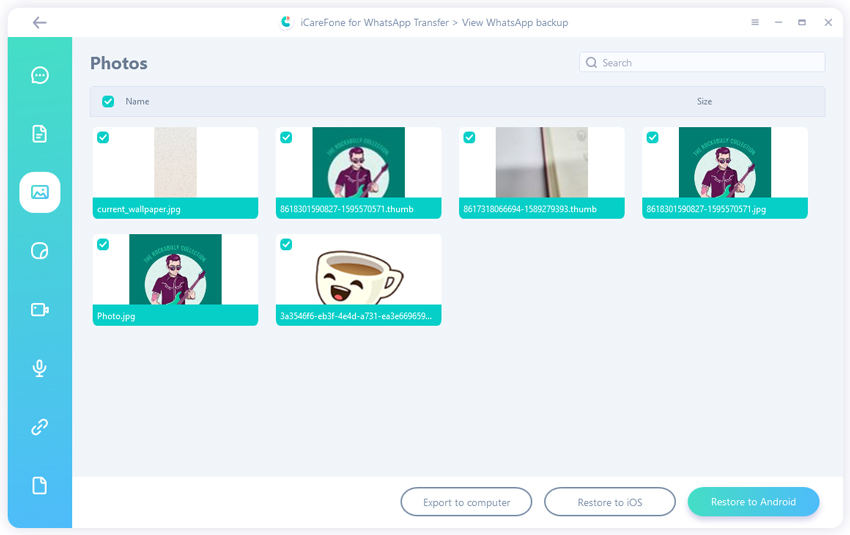
Step 2 Next, click "Export to computer" and select the folder to save the photos.
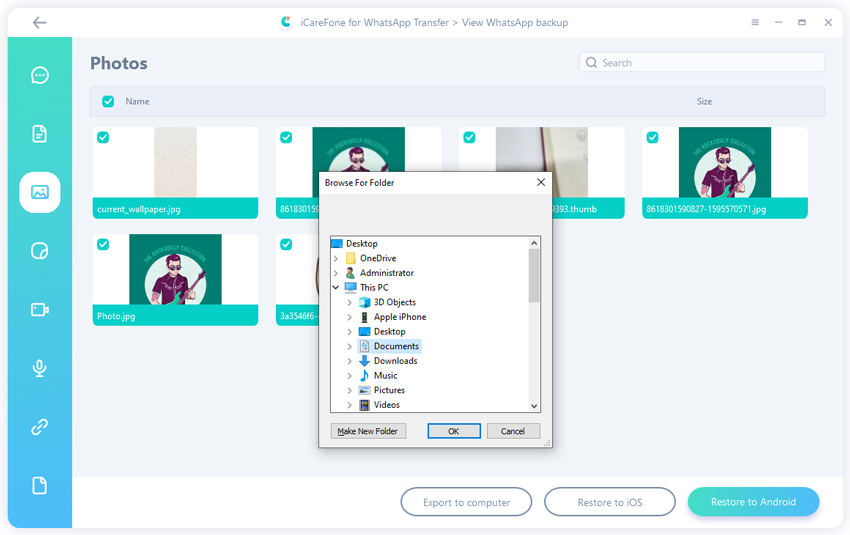
Step 3 In the end, your media files will be stored to the folder.

Is it Helpful?
Still Need Help ?
Simply contact our support team who are happy to help out. You can submit an online form here.


